How to Restore a Website from an iThemes Security Database Backup
Having a database backup is one of the best ways to protect yourself from an attack. If something goes wrong, you can restore the database from a backup and replace the files with fresh ones. In this post, we'll cover how to restore a WordPress website from an iThemes Security database backup in just a few steps.

iThemes Security Database Backup Settings
Your first option when creating backups in Security is whether or not to create full database backups. Checking this box will have the backup script backup all tables in your database, even if they are not part of this WordPress site.
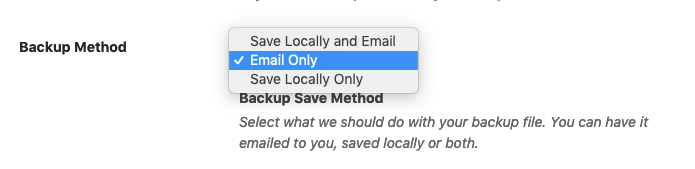
Next, you’ll need to determine what to do with the backup file. You can have the backup file emailed to you, saved locally to your computer or both.
Checking this box will have the backup script backup all tables in your database, even if they are not part of this WordPress site.
Next, you’ll need to determine what to do with the backup file. You can have the backup file emailed to you, saved locally to your computer or both.
 You’ll then determine how many backups you want to be kept. This setting only applies to how many backups are stored locally. You can set to 0 to disable.
 The next option is whether or not to compress the backup file.
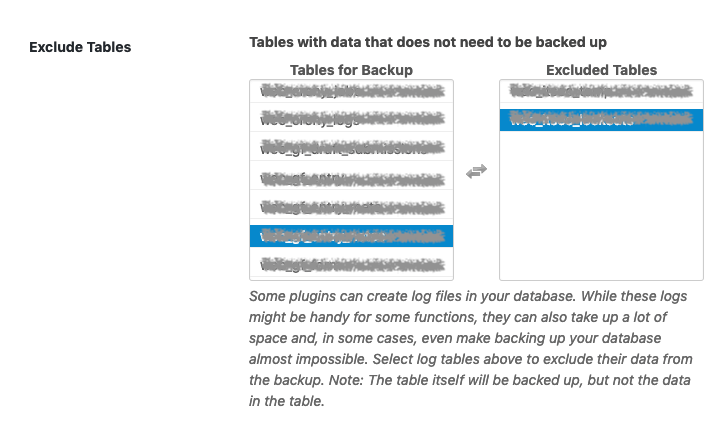
 Some plugins can create log files in your database. While these logs might be handy for some functions, they can also take up a lot of space and, in some cases, even make backing up and restoring your database almost impossible. In the Exclude Tables setting, you can select which tables to exclude their data from the backup.
 While you can manually create backups of your database whenever you need or want to, it’s a good idea to have backups scheduled to run automatically.
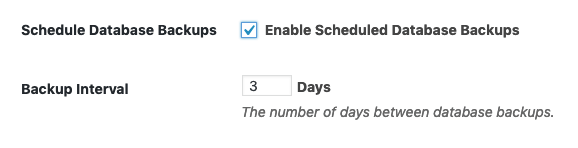 The Backup Interval setting is the number of days between database backups.
Now that you’ve set up and created your backups, you’re ready to do a restore.
The Backup Interval setting is the number of days between database backups.
Now that you’ve set up and created your backups, you’re ready to do a restore.
Database Backup Restore with iThemes Security
To get started with your iThemes Security backup restore, the first step is to download your backup from your email or where it’s stored locally. Then you’ll need to log into phpMyAdmin. Once logged into phpMyAdmin, you’ll need to select the database where you want to import your database file.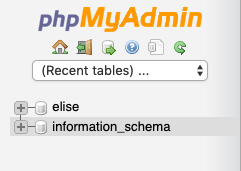 When you’ve selected your database, you should see all the tables in the database (if there are any). Above the tables is a menu which you’ll want to select Import from.
 On the Import page, you’ll be able to select your downloaded backup file to upload.
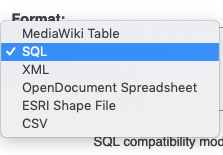
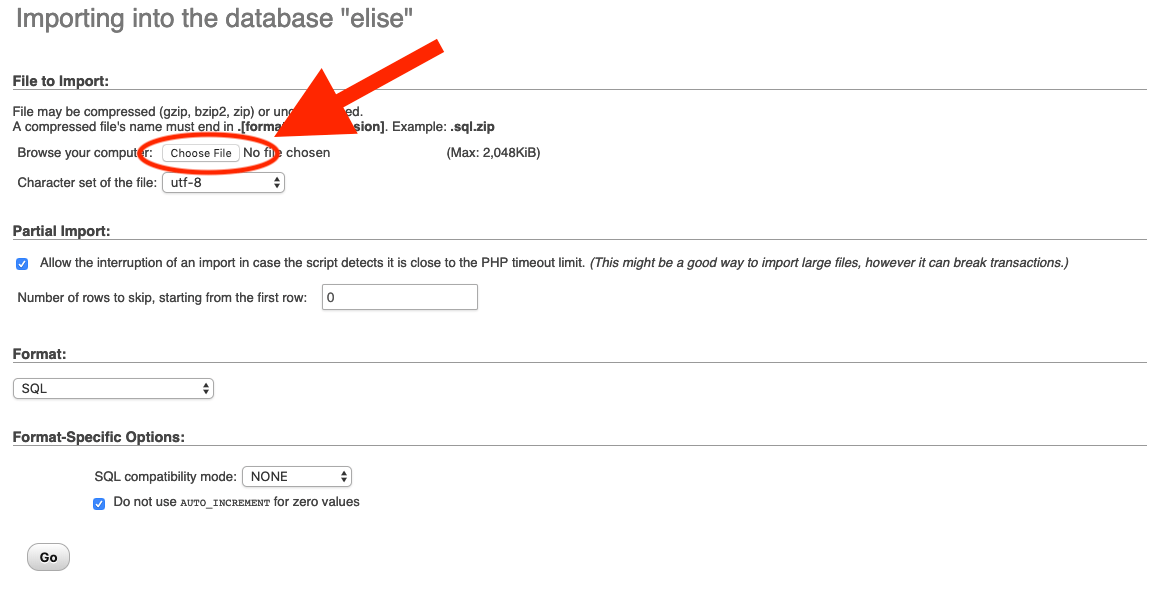 Before you select Go, be sure that the Format option is set to SQL.
 With your file selected and the Format set to SQL, you’re ready to hit Go!
The database restore may take a while depending on how large your site is but you should see a success screen after a while.
Once you see the success screen, you’ve completed your iThemes Security backup restore!
With your file selected and the Format set to SQL, you’re ready to hit Go!
The database restore may take a while depending on how large your site is but you should see a success screen after a while.
Once you see the success screen, you’ve completed your iThemes Security backup restore!
More Advanced Backup and Restore with BackupBuddy
While the iThemes Security plugin can handle a simple database backup of your website, BackupBuddy, the WordPress backup plugin, can backup your entire WordPress website (database, files, everything!). iThemes Security Pro, our WordPress security plugin, offers 30+ ways to secure and protect your website from common WordPress security vulnerabilities. With WordPress two-factor authentication, brute force protection, strong password enforcement and more, you can add an extra layer of security to your website.Join us for the next Solid Academy Webinar!
Free weekly webinars that will help you master WordPress and increase your business's bottom line.
What is a WordPress Phishing Attack?
Learn how to identify and prevent phishing attacks on WordPress websites.
Kiki SheldonWebsite Protection: 5 Ways to Keep Your Website Safe
Robust website protection is the shield that stands between your business and relentless cyber attacks. Prioritizing website protection enables businesses to fortify defenses to safeguard their online presence and preserve the trust of their customers in the face of ever-evolving cybersecurity threats.
Kiki Sheldon23 Ideas To Grow Your WordPress Business in 2023
WordPress is the most popular website-building platform worldwide, trusted by numerous brands. WordPress enables you to build a user-friendly and highly reliable site, together with tools and plugins to enhance your marketing and work like a lead magnet. All these features make WordPress the platform chosen by more than 43% of businesses globally.
SolidWP Editorial TeamSign up now — Get SolidWP updates and valuable content straight to your inbox
Sign up
Get started with confidence — risk free, guaranteed

