Complete WordPress Website Restore with BackupBuddy: The Ultimate Guide
If you ever need to restore your WordPress website to a previous version, the BackupBuddy plugin has you covered. That's why we call it the "3-in-1" WordPress backup plugin: BackupBuddy can backup, restore and migrate WordPress sites. Unfortunately, a total website restore usually involves something that went really wrong .

If you ever need to restore your WordPress website to a previous version, the BackupBuddy plugin has you covered. That’s why we call it the “3-in-1” WordPress backup plugin: BackupBuddy can backup, restore and migrate WordPress sites.
Unfortunately, a total website restore usually involves something that went really wrong … from a hack or security breach, a fatal error, accidentally deleted files or a server crash. Because this usually means a pretty stressful event, we want to make sure you have the instructions you need to restore your site with as little downtime as possible.
We actually created BackupBuddy back in 2010 because we lost our own website and had to completely rebuild it … twice.

Back then, WordPress didn’t have any backup solutions, so we built BackupBuddy so that no one would ever have to go through what we did: 120 hours—3 entire work weeks—lost on site failures.
So, if you find yourself on this tutorial in a stressful situation, we know how you feel. Let’s jump right in … and get that site restored!
How BackupBuddy Handles a Complete Website Restore
If you need to restore your entire website and not just parts of it, this usually means you no longer have access to your WordPress admin dashboard. A Complete website restore is usually in order if your site is completely broken or unusable and the best (or only) option is to restore the entire site with a previous backup.
If a complete website restore can’t be handled inside the WordPress admin dashboard, it requires a “Manual Restoration.” We’ll need to go a few levels deeper into your website’s server, files and database to completely restore it.
Here’s a basic overview of how the BackupBuddy Complete Website Restore process works when you no longer have access to your WordPress Admin:
- You upload a file called ImportBuddy and a Complete Backup (zip) file to your website’s server.
- Through a 6-step process, ImportBuddy unpacks the Complete backup file to restore your site to the version included in the backup.
What You Need Before You Begin
Before you begin a Complete site restore, you’ll need a few things.
- 1. A Complete backup zip file of your site made with the BackupBuddy plugin. This is a backup zip file you can download from the Remote Destination you use to store your backups such as BackupBuddy Stash. You may have also downloaded it directly to your computer.
- 2. File manager access to your website’s server (to upload files). You can usually access your website’s file through your hosting account, like cPanel’s File Manager. You can also use a text/code editor like BB Edit or Coda that allows you to connect to a server via sFTP.
- 3. Database access via PHPmyAdmin or another interface in your hosting account. You’ll need a clean/fresh database plus a database user and password with admin privileges.
- 4. The ImportBuddy file. You can download the ImportBuddy file in a couple of ways we cover in the next section. For security purposes, you’ll be asked to set a password for your ImportBuddy file in several different places throughout the BackupBuddy plugin (like during Quick Setup), depending on how you download the file.
Steps for Complete Restore with BackupBuddy
1. Prepare for the restore by gathering the necessary “supplies”
In the previous section, we listed everything you need to perform a Complete site restore with BackupBuddy.
- 1. A Complete backup zip file of your site made with the BackupBuddy plugin
- 2. File manager access to your website’s server (to upload files)
- 3. Database access via PHPmyAdmin or another interface in your hosting account
- 4. The ImportBuddy file (+ your ImportBuddy password)
Let’s jump into how to get all of these things together if you need some guidance:
Download Your Latest Complete or “Full” Backup Zip File
A Complete (or “Full”) backup is one of the 5 types of WordPress backups that BackupBuddy can make of your site. A Complete backup is exactly what is sounds like … it’s the “whole enchilada” backup of your site. A Complete backup contains all files related to your WordPress installation, including your WordPress database, your theme and plugin files, and your Media Library. You’ll need a Complete backup file to do a Complete site restore.
We always recommend that you store your backup files and a copy of ImportBuddy in a Remote Destination such as BackupBuddy Stash in case you’re not able to access your server. If you have not downloaded a Complete backup file already, go ahead and download it.
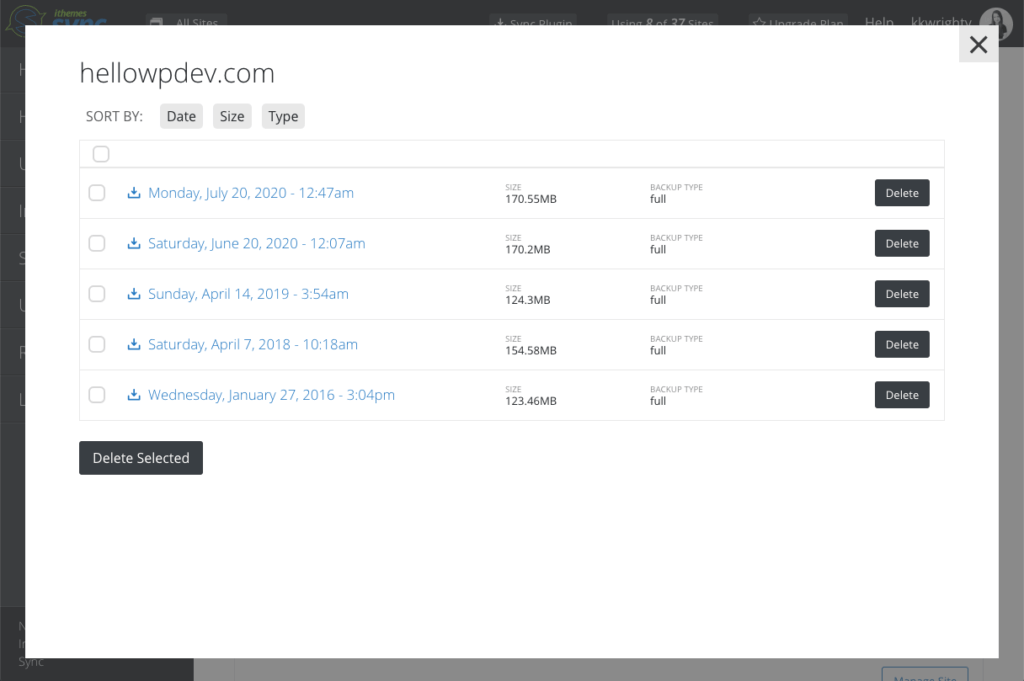
In this example, we’re downloading a complete backup file sent to BackupBuddy Stash and access via iThemes Sync. In Sync, a BackupBuddy Complete backup will be listed as “Full” under Backup Type.
Open a File Manager Connected to Your Server or Hosting Account
Next, you'll need to make sure you've got a File Manager open for your hosting account or server. You can access your website's files in a couple of different ways:
- From your hosting account > cPanel > File Manager
- From a code/text editor connected to your server via sFTP credentials (you usually get this info when you first purchase your hosting account)
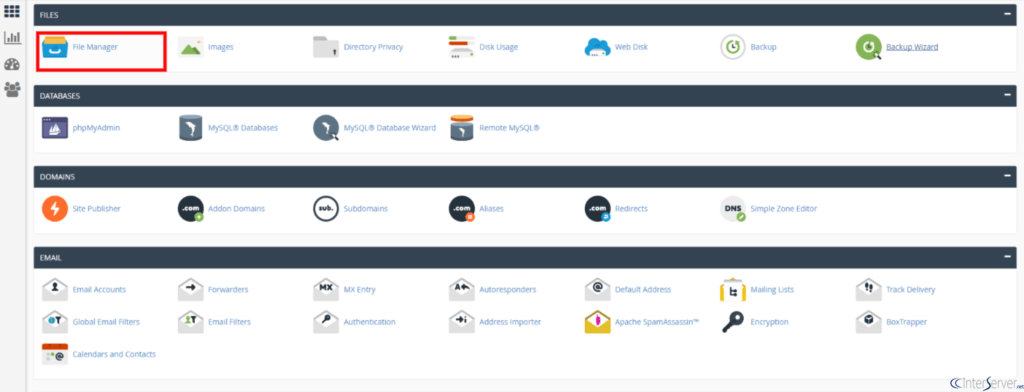
Here's where the File Manager is located within cPanel:
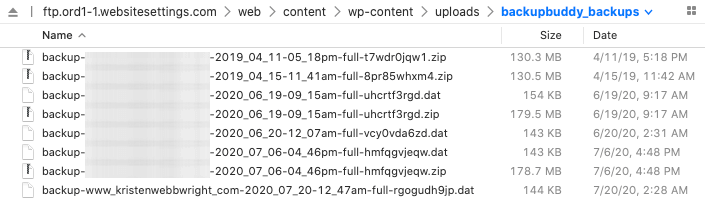
And in this example, we're using the Coda code editor, connected to a server. You can see the file directory listing of this server.
Get Your Database Access Credentials
Log in to your server's PHPMyAdmin account to access your site's database. You're going to need a clean (empty) database and a user with admin credentials.
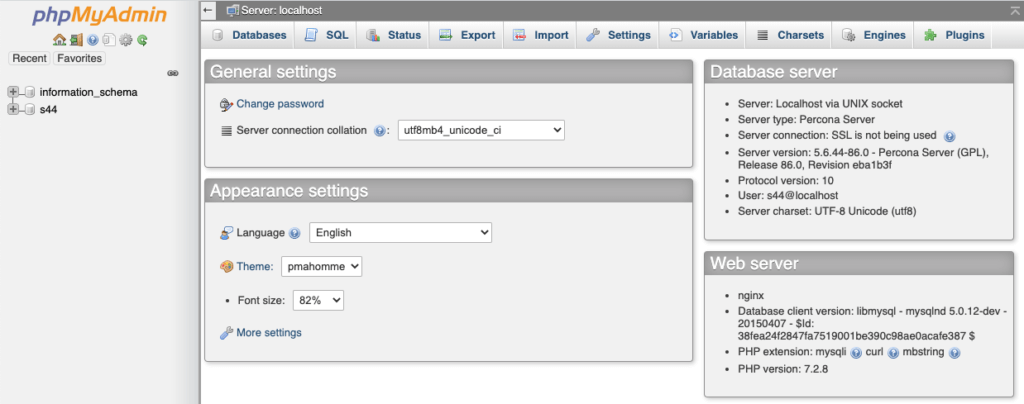
In another hosting account, you may have a different view of your database info.
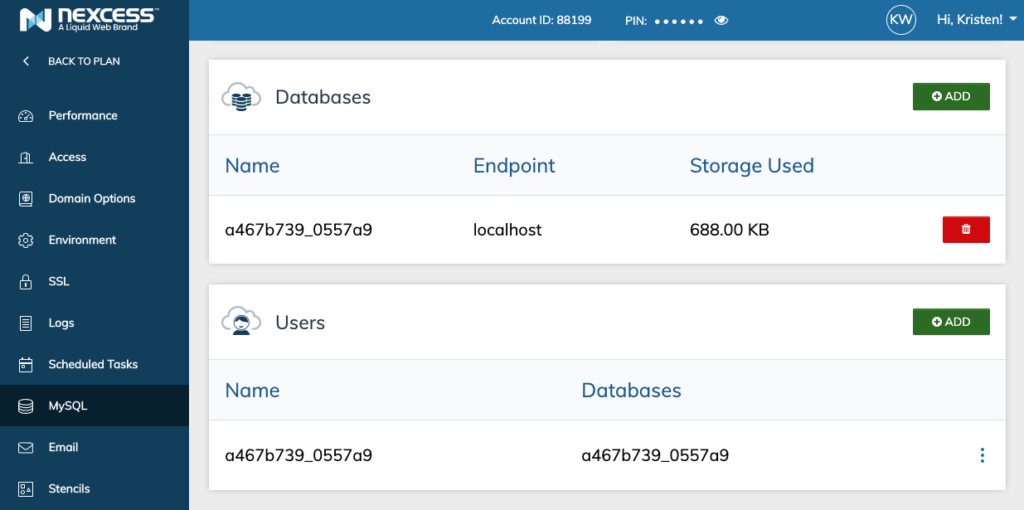
Go ahead and copy your database info down as you will need it in a later step:
- Database Name - This is the name of the database you want to restore you site to. It can also be a clean/fresh database.
- Database User - This is the database user account that has permission to access the database. This user must be given permission to this database for the import to work.
- Database Password - This is the password for the database user.
Download the ImportBuddy File + Set A Password
Last up, you need to download the ImportBuddy file.
ImportBuddy can be downloaded in a few ways:
- From iThemes Sync (for any website you have synced that also uses BackupBuddy) (here's more on downloading ImportBuddy from Sync)

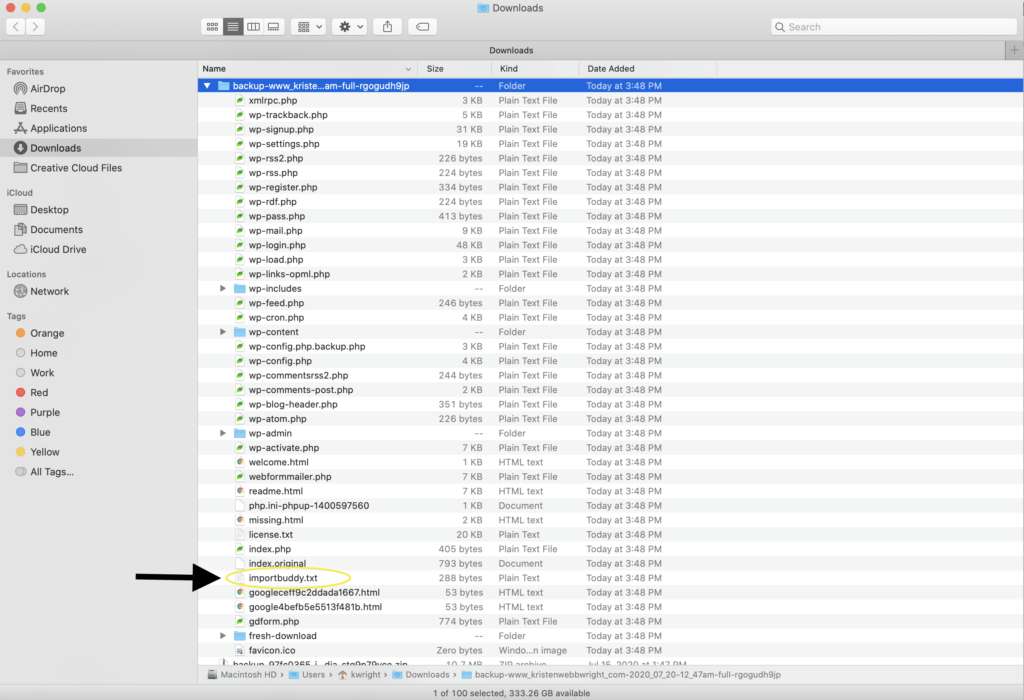
- Extracted from your backup zip file (here's where to find a copy of importbuddy.php in your backup zip file)
- From within the BackupBuddy plugin (if you still have WP Admin access). Navigate to the BackupBuddy > Backups tab, then click the menu for ImportBuddy to download it directly. You can also send it to a Remote Destination.

2. Upload the ImportBuddy file and Your Complete Backup Zip To Your Server
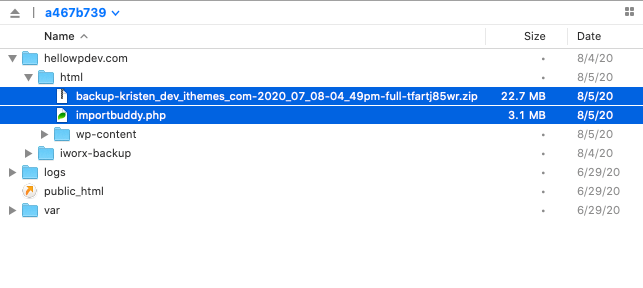
Once you've downloaded your backup zip file and the ImportBuddy file, it's time to upload both the ImportBuddy file and your Complete backup zip file to the same directory on your server, where your website currently resides.
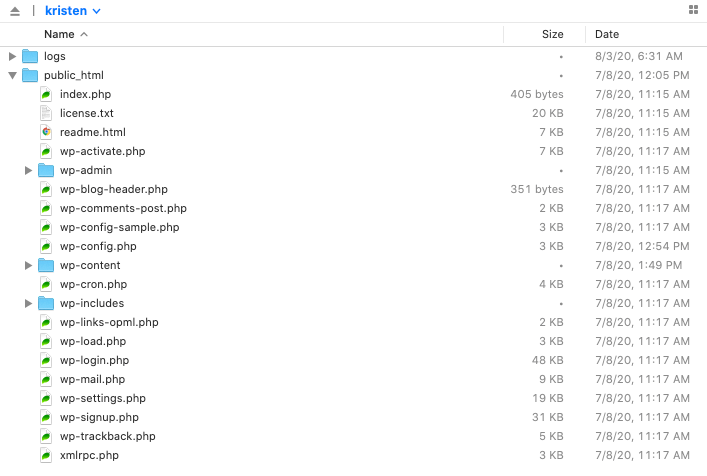
Upload the backup file (do not rename the zip file!) and the Importbuddy.php file to your chosen directory. You'll see these two files once they finish uploading.
4. Load Your ImportBuddy URL
Now it's time to let ImportBuddy work its magic. ImportBuddy will load after you access the file using this URL format:
mysite.com/importbuddy.php5. Walk Through the 6 ImportBuddy Steps to Complete the Restore
There are 6 ImportBuddy steps to go through for a successful website restoration. Let's walk through them.
Step 1: Authentication Required & Choose Your Backup File
Once you've accessed the ImportBuddy file through your browser, the first step will load. You'll be prompted to enter your ImportBuddy password to continue.
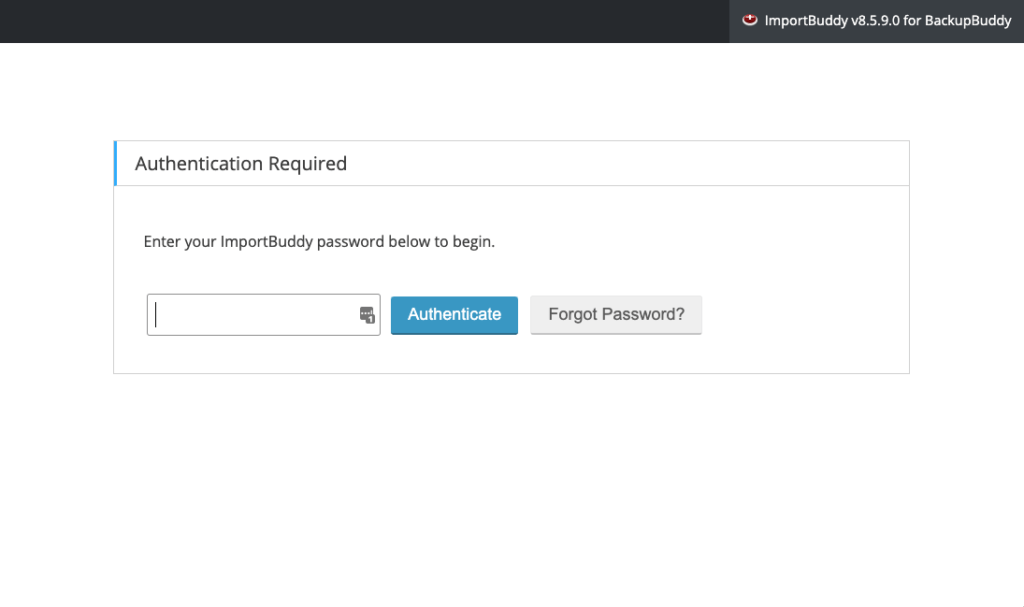
Step 1 also prompts you to choose your backup file for the migration. Since we've already uploaded the file, you'll see it listed as a selection. If you have a Stash account, you can Restore from Stash / Stash Live if you have files saved to your account.
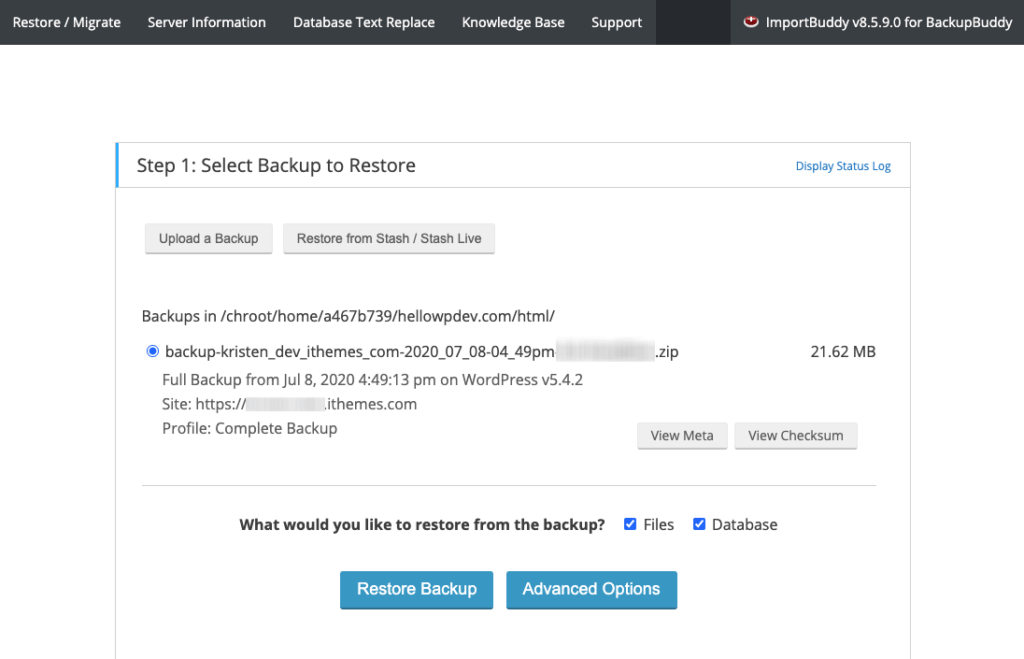
Once you've selected your Advanced Options or if you do not need to select any of these options, click Next Step.
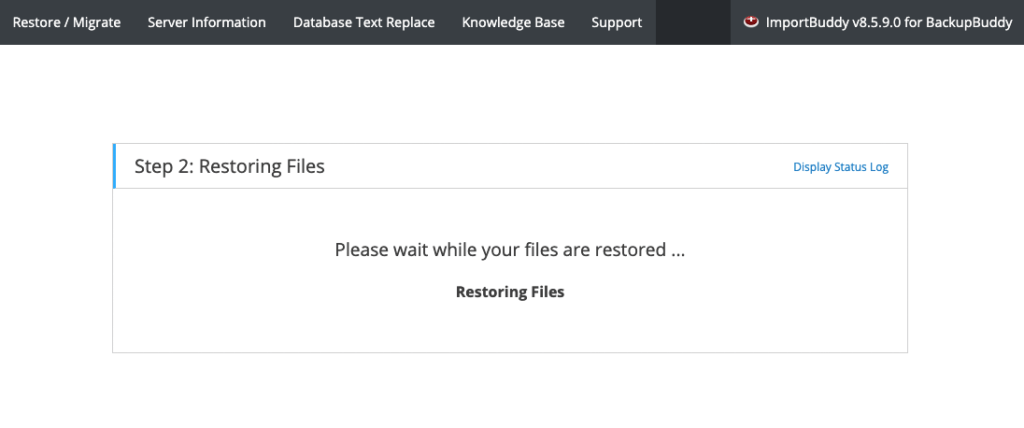
Step 2: Unzipping Backup File
The next step unzips the backup file. There is nothing you need to do for this step. Just select Next Step once the extraction has completed.
Step 3: URL and Database Settings
This is where you will enter the database settings for the new location that you saved as you prepared for the restoration.
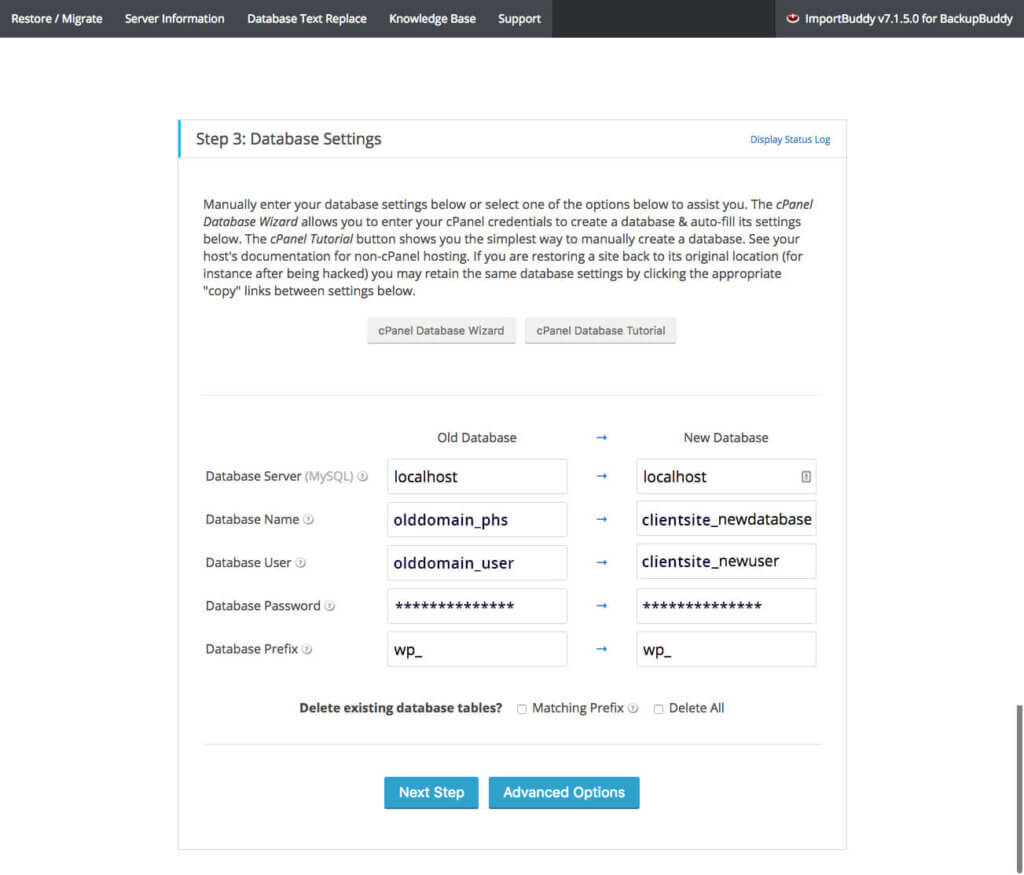
These settings control where your backed up database will be restored to. Here are a few important things to note:
- If you are restoring to the same server, the settings below will import the database to your existing WordPress database location, overwriting your existing WordPress database already on the server.
- If you are moving to a new host you will need to create a database to import into.
- The database settings MUST be unique for each WordPress installation.
- If you use the same settings for multiple WordPress installations then all blog content and settings will be shared, causing conflicts!
| Old Database Database | New Database | Explanation | |
|---|---|---|---|
| Database Server | localhost | localhost | In almost all cases, this field will be "localhost." This is the address to the mySQL server where your database will be stored. The location of your mySQL server will be provided to you by your host if it differs from "localhost." |
| Database Name | olddomain_phs | olddomain_phs | This is the name of the database we wrote down in the prep step. |
| Database User | olddomain_user | olddomain_user | This is the name of the user we wrote down in the prep step. |
| Database Password | *************** | *************** | This is the password for the user. |
| Database Prefix | wp_ | wp_ | This is the prefix given to all tables in the database. For the purposes of this tutorial, we'll leave it at wp_ (since the previous version of the site used it). |
Once you've entered all the new database information or created your new database, click Next Step.
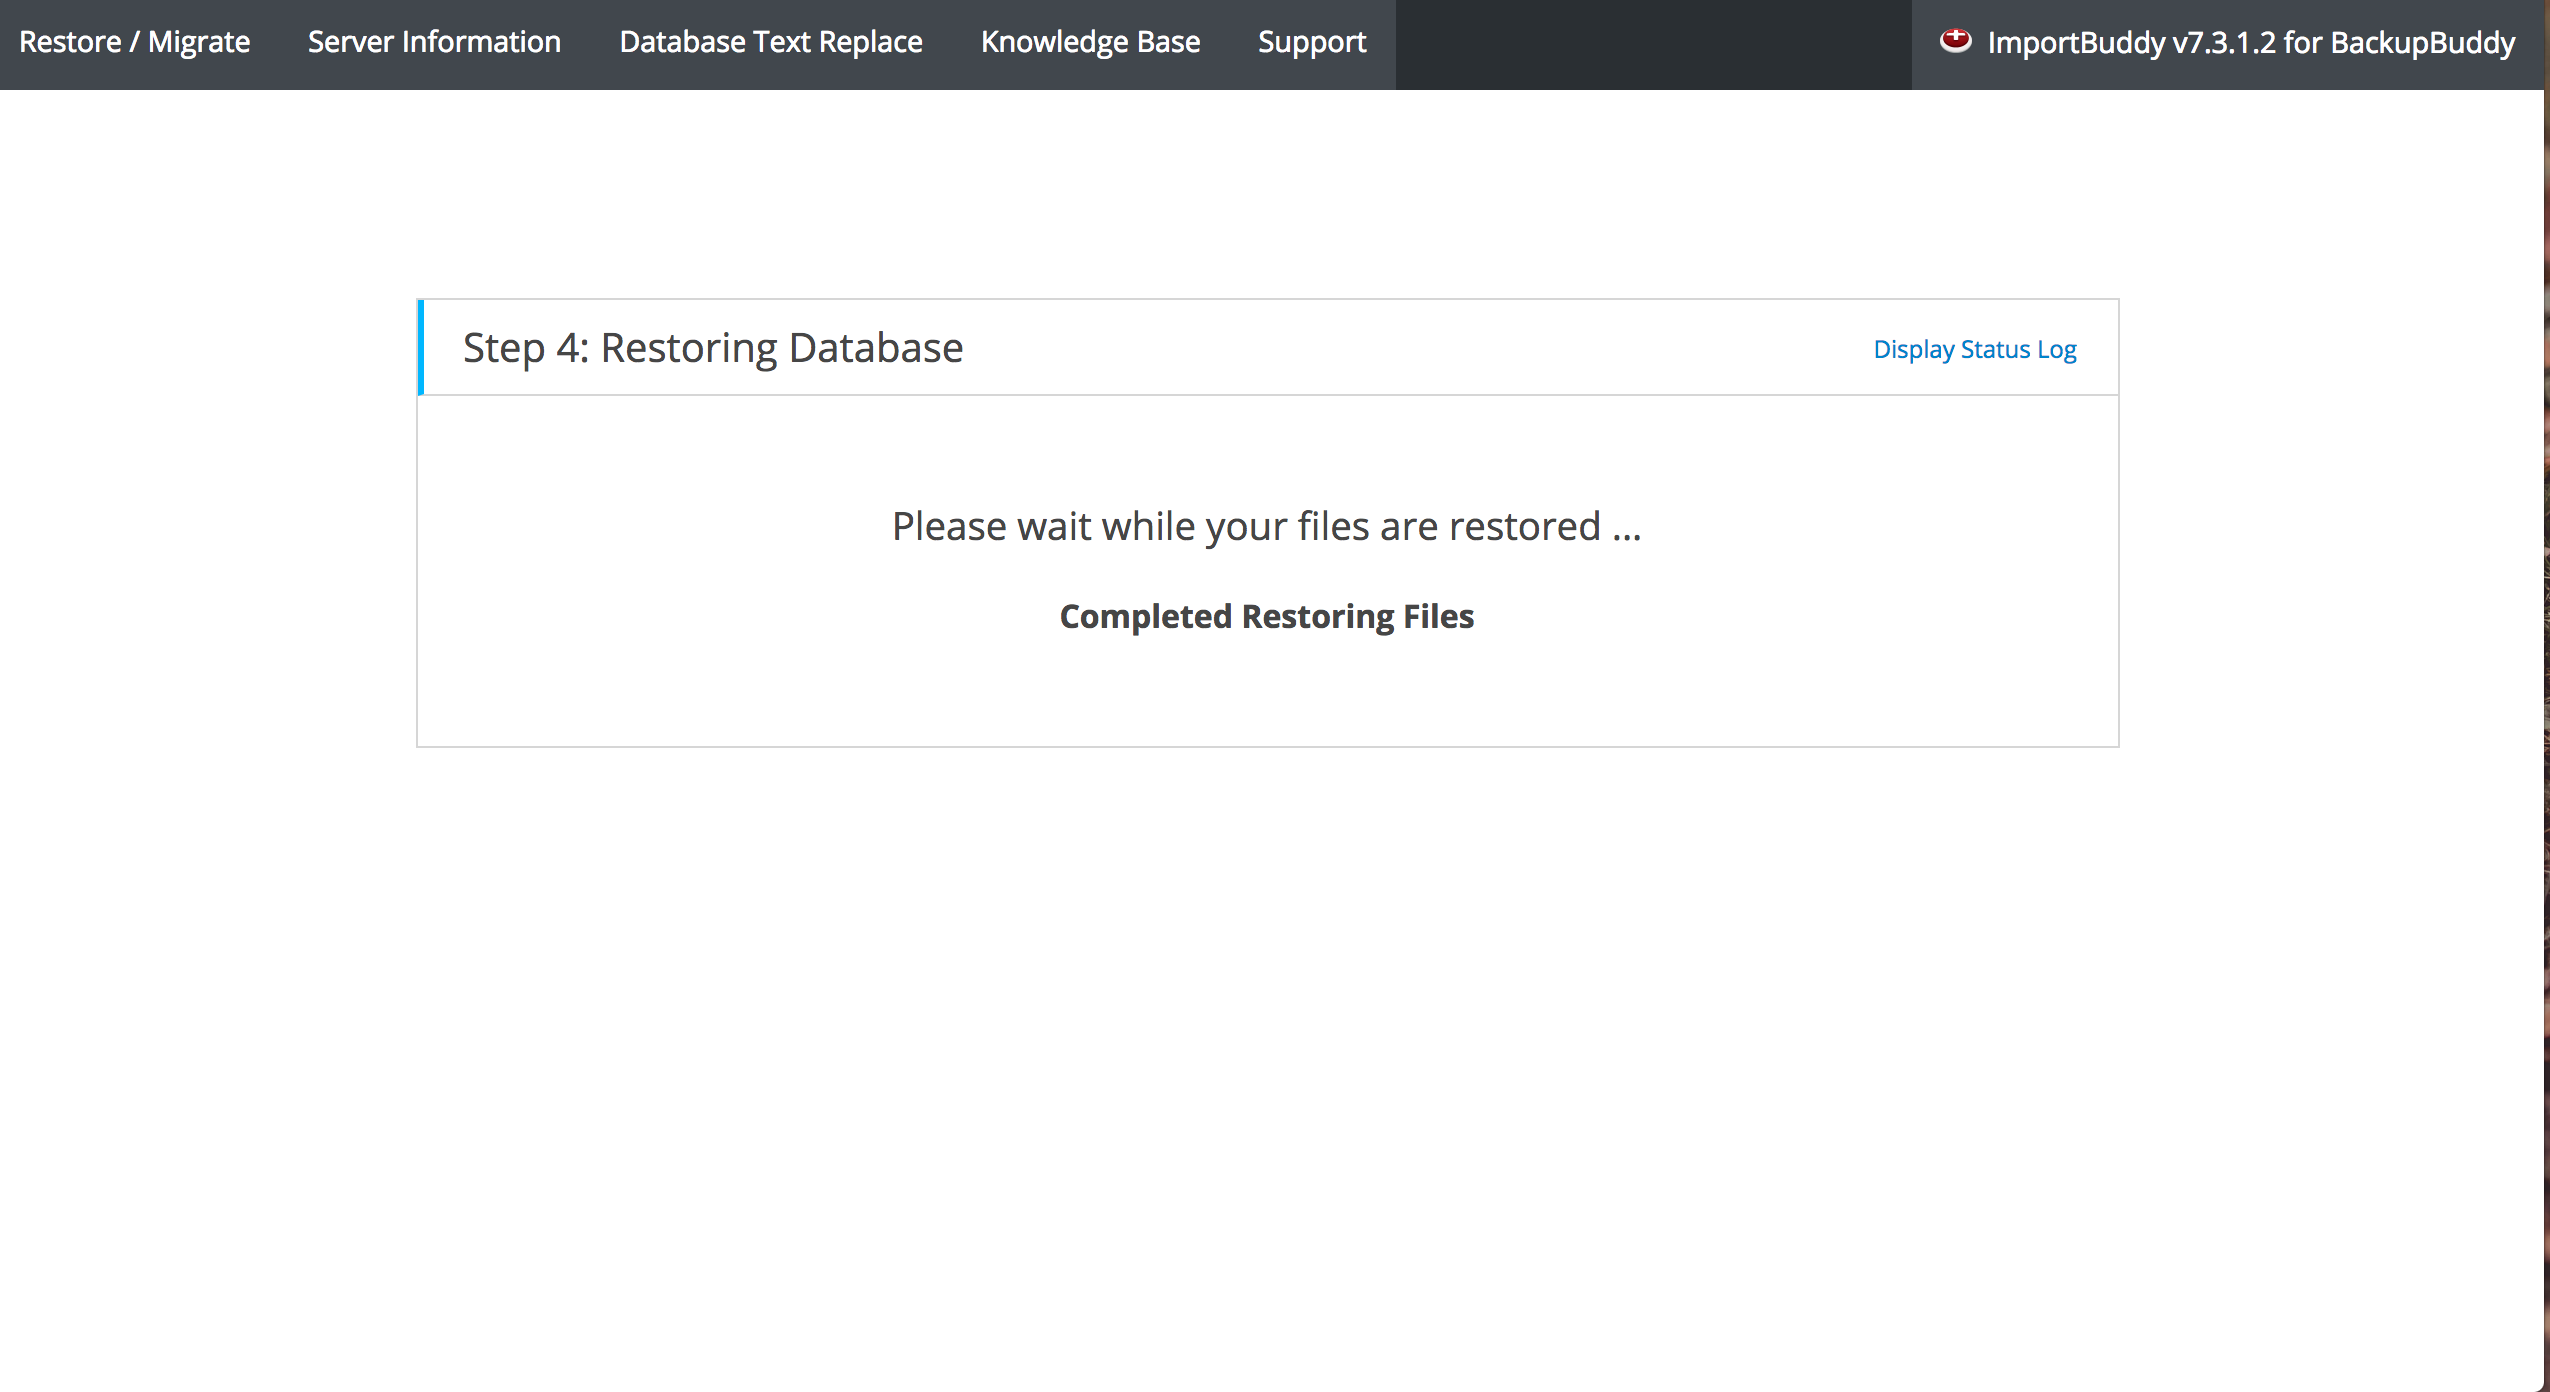
Step 4: Database Import
Step 4 imports the database information into the database of your new site. Once the import is completed, click the Next Step button.
Step 5: Database Migration
This step updates all of the URLs, paths, etc. on your site to make sure everything matches (this is especially helpful if you are using this process to move your site to a new host or domain name).
Before you move to the final step, be sure to go to your restored site and check all of your links to ensure they have changed. You may view your entire import log for providing to support by clicking the View Import Log button.
Once you've tested your new site, you can move to the final step by clicking Clean up & remove temporary files.

Step 6: Final Cleanup
Step 6 removes any temporary files from your new site that were used for the restoration. Your site will then be ready at the URL indicated on that page.
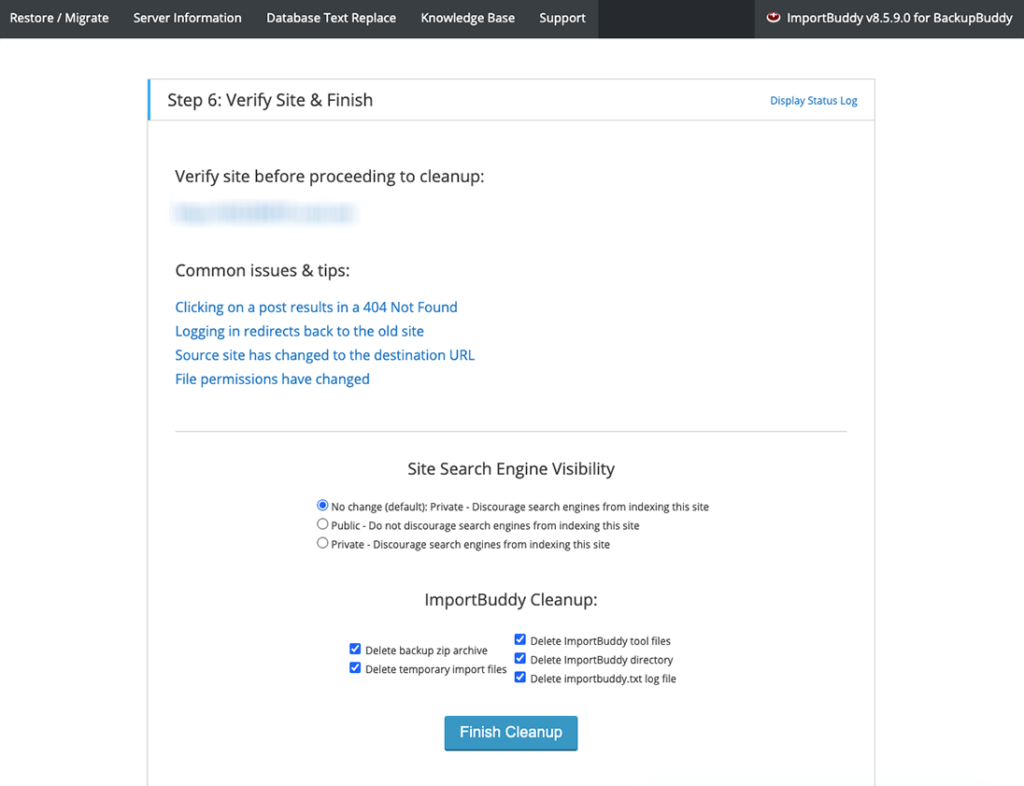
Once you click the Finish cleanup button, your site will be restored!

Help with Restoring
Your active BackupBuddy subscription includes live, ticketed support. If you get stuck during any step in this process, our BackupBuddy support team is ready to help! Just visit the iThemes Help Desk to open a ticket.
Get BackupBuddy, the 3-in-1 WordPress Backup Plugin
BackupBuddy, our WordPress backup plugin, can backup, restore and migrate your WordPress website to a new host or domain. You can then store you backups safely off-site with OneDrive, Dropbox and Google Drive integration, or use BackupBuddy Stash, our secure, remote backup storage destination (you get 1GB free with your BackupBuddy subscription!)
Need to restore from a backup? Check out BackupBuddy University: Restore Plugins, Themes, WordPress Version and Individual Files for a look at BackupBuddy's in-dashboard restore feature.
Download now
Join us for the next Solid Academy Webinar!
Free weekly webinars that will help you master WordPress and increase your business's bottom line.
What is a WordPress Phishing Attack?
Learn how to identify and prevent phishing attacks on WordPress websites.
Kiki SheldonWebsite Protection: 5 Ways to Keep Your Website Safe
Robust website protection is the shield that stands between your business and relentless cyber attacks. Prioritizing website protection enables businesses to fortify defenses to safeguard their online presence and preserve the trust of their customers in the face of ever-evolving cybersecurity threats.
Kiki Sheldon23 Ideas To Grow Your WordPress Business in 2023
WordPress is the most popular website-building platform worldwide, trusted by numerous brands. WordPress enables you to build a user-friendly and highly reliable site, together with tools and plugins to enhance your marketing and work like a lead magnet. All these features make WordPress the platform chosen by more than 43% of businesses globally.
SolidWP Editorial TeamSign up now — Get SolidWP updates and valuable content straight to your inbox
Sign up
Get started with confidence — risk free, guaranteed

