How to Get Started with Stash Live
Stash Live is a brand new way to backup your WordPress site with BackupBuddy, our WordPress backup plugin, beginning in version 7.0. To get started using Stash Live, all you'll need is BackupBuddy 7.0 and your iThemes username and password. Why Use Stash Live? It makes backing up your WordPress site easy and more reliable.

Stash Live is a brand new way to backup your WordPress site with BackupBuddy, our WordPress backup plugin, beginning in version 7.0.
To get started using Stash Live, all you’ll need is BackupBuddy 7.0 and your iThemes username and password.
Why Use Stash Live?
- It makes backing up your WordPress site easy and more reliable. Stash Live makes backing up your WordPress site easier and more reliable because it offloads the heavy-lifting of running backups from your server to our service. If you’ve had issues with BackupBuddy running on slow, shared hosting, or if you’ve been limited by server configurations you can’t control, Stash Live was made for you.
- Backups will just run automatically. Once you set it up, Stash Live automatically creates snapshots of your site periodically, which is a recording of your site at that very moment.
- You won’t have to wrestle with other remote destinations that weren’t actually designed for storing WordPress backups. With Stash Live, your backups are safely stored in BackupBuddy Stash, our secure, off-site storage destination that we built to work seamlessly with BackupBuddy. Plus, as a BackupBuddy customer, you get 1GB of free Stash storage space, which is enough to store about 6 backups of an average WordPress site (150MB).
- Restoring your site is faster with Stash Live. Stash Live has new integrations with ImportBuddy, BackupBuddy’s tool for restoring your WordPress site. If you’ve been using the old ImportBuddy method, you’ll love how much faster restores are with Stash Live backups.
How to Update to BackupBuddy 7.0
To start using Stash Live, you’ll need to be running BackupBuddy 7.0 or higher. Make sure BackupBuddy is licensed to make sure you can get the the 7.0 update. If you’re running BackupBuddy on multiple sites, save a lot of time licensing BackupBuddy on your sites by using iThemes Sync. You can also use the manual method of licensing BackupBuddy on your sites, too.
Once you’ve licensed BackupBuddy, there are 3 different ways to update to BackupBuddy 7.0:
- Update BackupBuddy on multiple sites now from the Sync Dashboard.
- Update directly from your WordPress dashboard from the Dashboard > Updates menu.
- Download the latest version of BackupBuddy from the iThemes Member Panel for manual updates.
Logging In & Starting Stash Live in 5 Steps
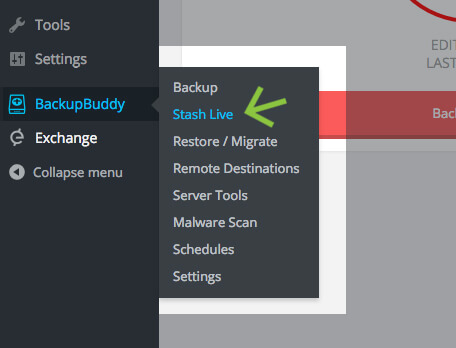
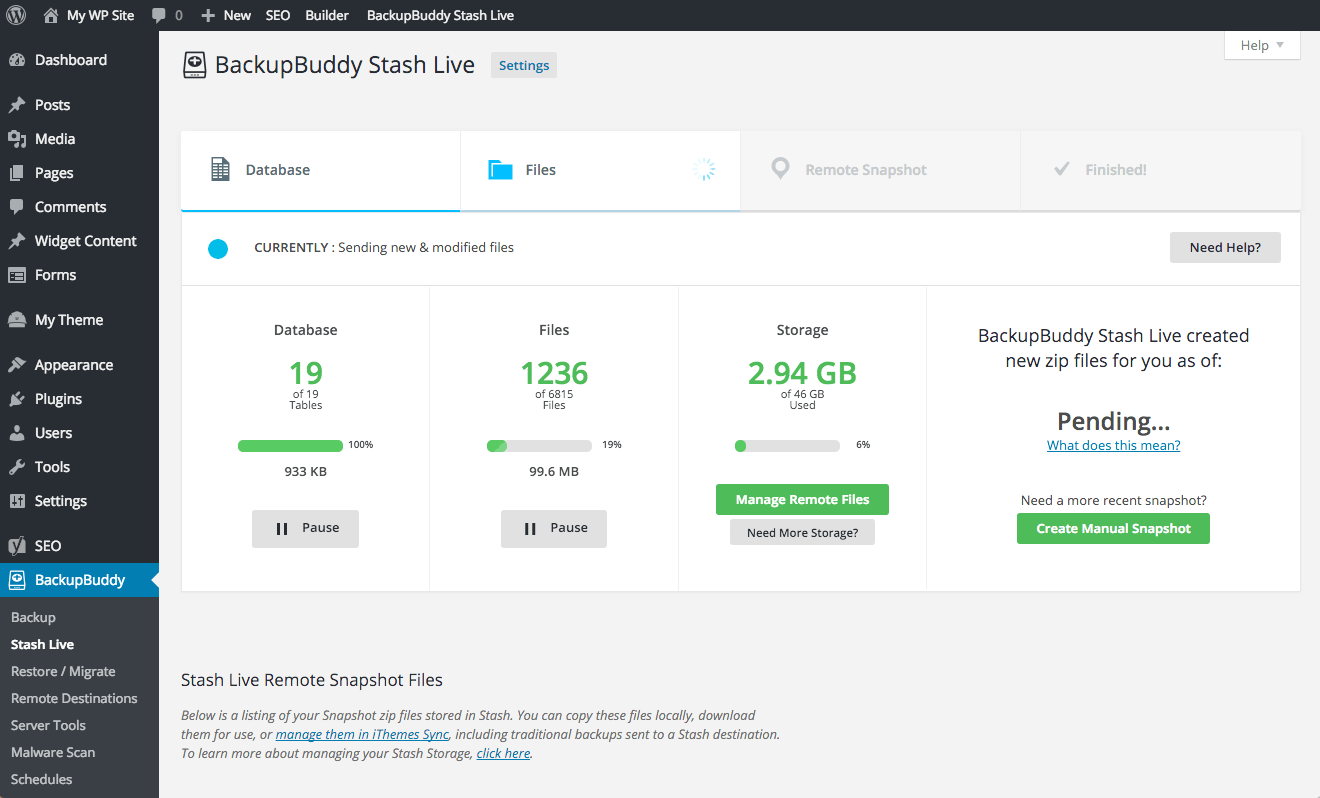
1. Once you’ve updated to BackupBuddy 7.0, login to your WordPress site. From your WordPress dashboard, you’ll see a new Stash Live menu item in your BackupBuddy menu. Click the Stash Live link to open the Stash Live page.
2. On the Stash Live page, enter your iThemes username and password. (This is the same username and password you used to purchase your iThemes products, and it’s the same info you use to login to the iThemes Member Panel.)
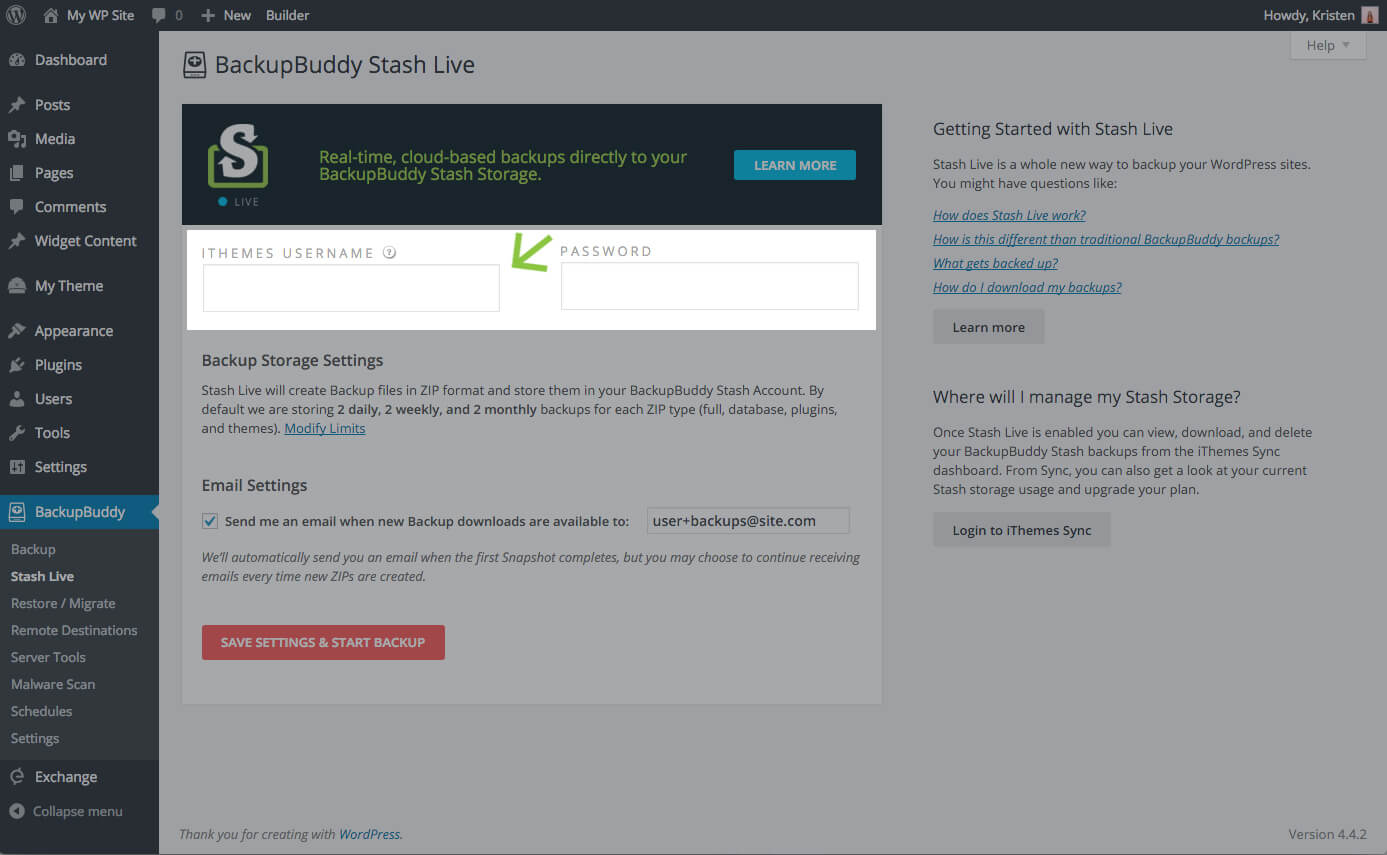
3. In the next section, we give you the options to configure your Stash Live backup storage settings in your Stash account. Don’t forget: all BackupBuddy customers get 1GB of free Stash space, enough for about 6 backups of the average WordPress site (150MB).
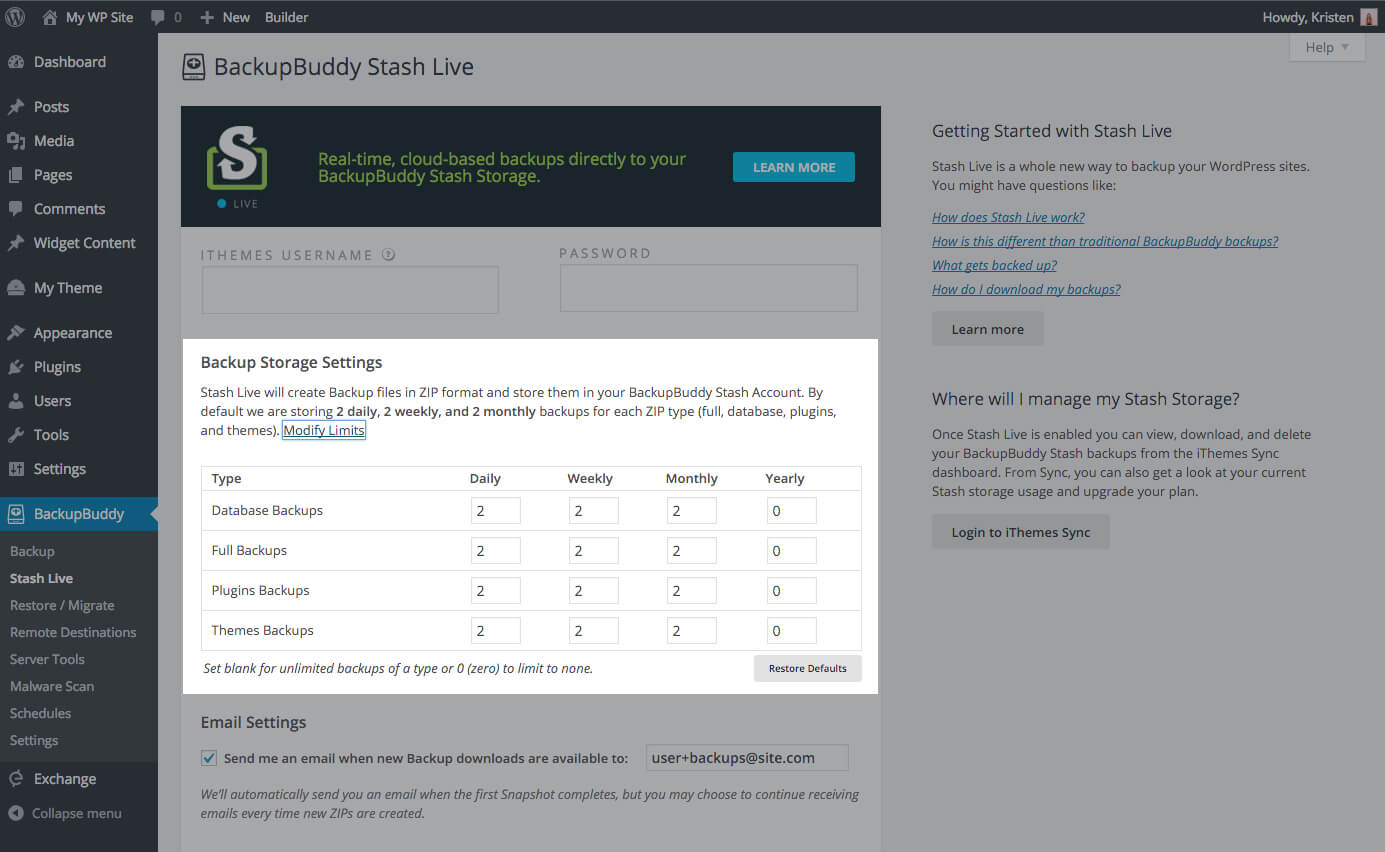
We’ve filled these out for you based on our backup storage recommendations, so you don’t have to mess with these, but you can click the Modify Limits link to reveal the settings. By default we are storing 2 daily, 2 weekly, and 2 monthly backups for each ZIP type (full, database, plugins, and themes).
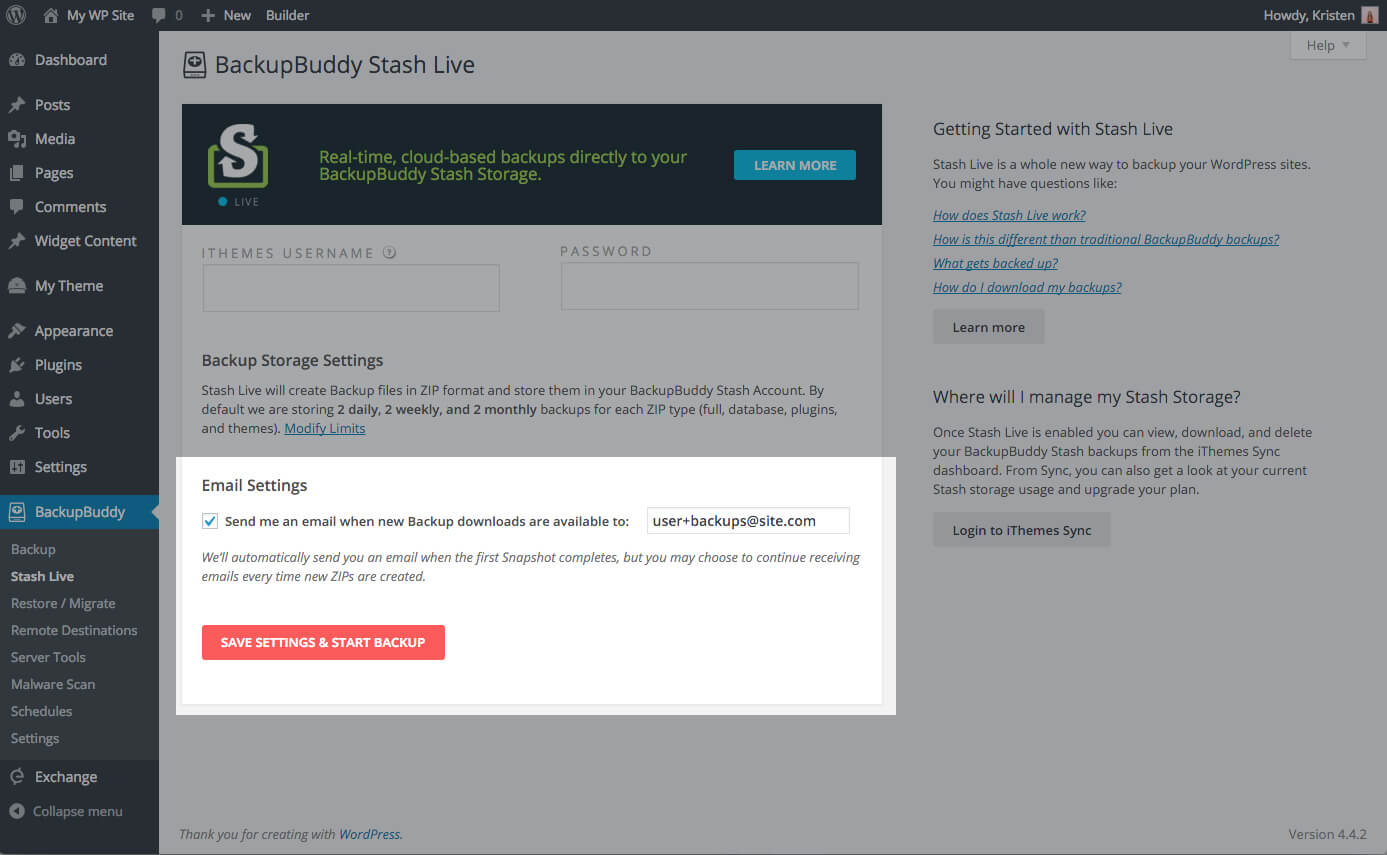
4. The last section is your email settings. We’ll automatically send you an email when your first Snapshot completes, but you can choose to continue receiving emails every time new backups are created. Make sure the email address listed in this section is correct.
Tip: if you’re using a gmail email address you can add “+backups” to the end of your email address handle to better organize your backup emails. Emails will still deliver to your original email address, but you can set up a filter to add these to a different folder.
5. Click the Save Settings & Start Backup button.
Creating Your First Snapshot
1. After you click the Save Settings & Start Backup button, Stash Live will automatically start building your first complete site Snapshot, or complete backup of your site.
2. Keep an eye on your inbox. You’ll receive an email notification once your first Stash Live backup completes.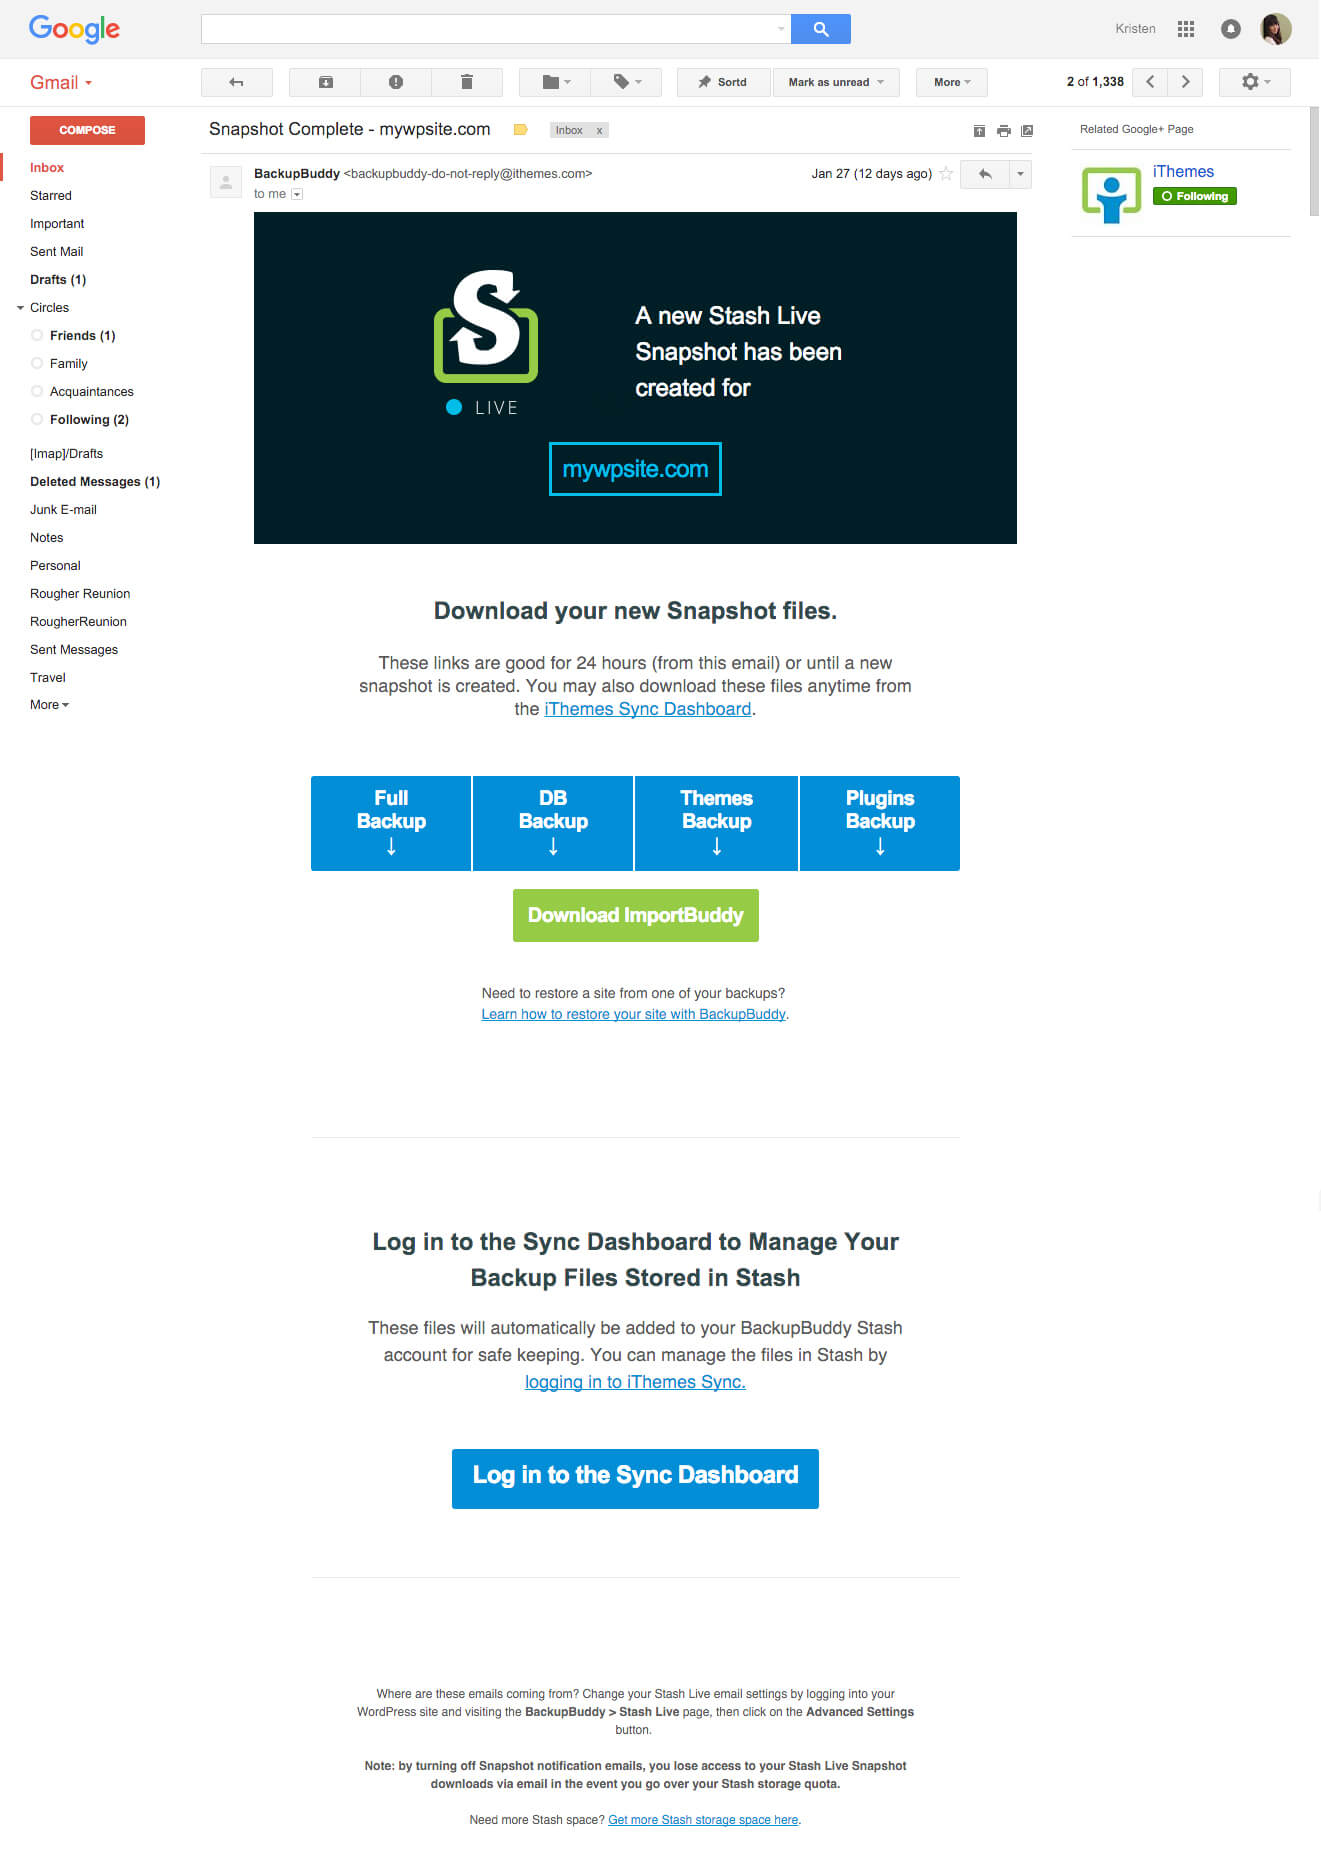
Managing Your Stash Live Backup Files from iThemes Sync
To manage the Stash Live backups stored in your Stash account, log in to the iThemes Sync dashboard.
1. If you’re new to Sync, check out the Sync quick setup guide. You can add your WordPress sites directly from the Sync dashboard, or using the Sync plugin. And don’t forget you can manage 10 WordPress sites for free.
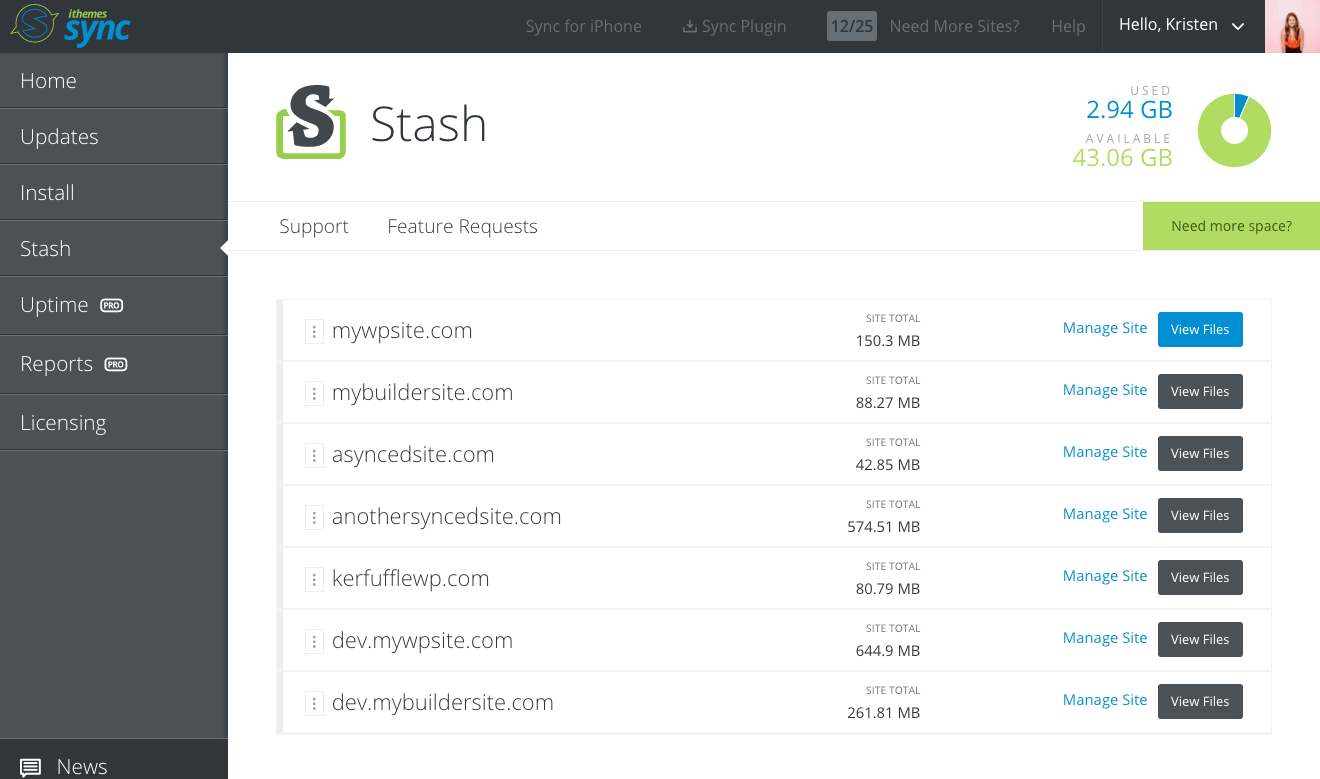
2. Click the Stash link in the left-hand menu. From the list, click the View Files button.
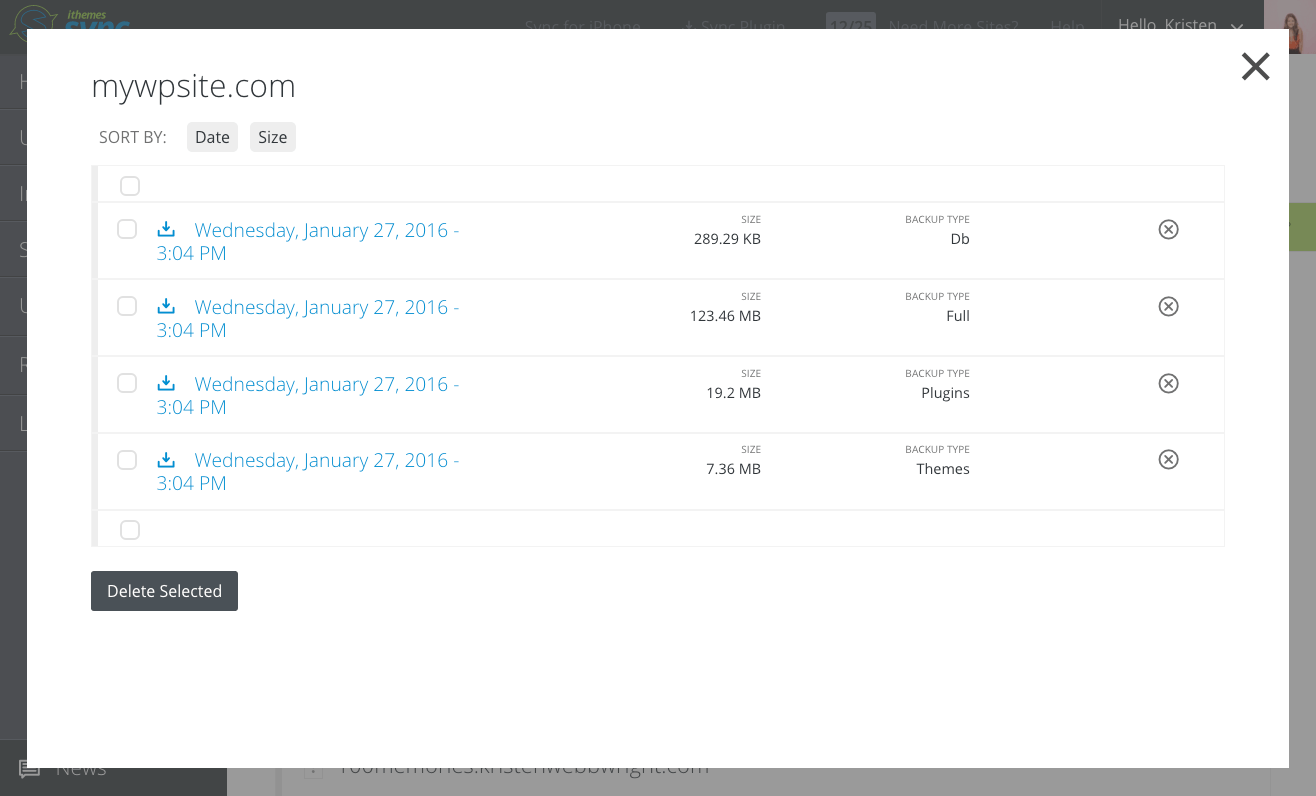
From here, you can download and delete your backup files. You’ll also notice separate zips for your complete backup, your database, your plugin & your themes for each Snapshot.
More Stash Live Tutorials
Check out the entire library of Stash Live tutorials here. If you have more questions about Stash Live, check out our Stash Live FAQs.
Need to manage more sites on Sync? Upgrade your iThemes Sync plan here.
Get Release Notes for SolidWP products delivered right to your inbox.
Sign up
Join us for the next Solid Academy Webinar!
Free weekly webinars that will help you master WordPress and increase your business's bottom line.
What is a WordPress Phishing Attack?
Learn how to identify and prevent phishing attacks on WordPress websites.
Kiki SheldonWebsite Protection: 5 Ways to Keep Your Website Safe
Robust website protection is the shield that stands between your business and relentless cyber attacks. Prioritizing website protection enables businesses to fortify defenses to safeguard their online presence and preserve the trust of their customers in the face of ever-evolving cybersecurity threats.
Kiki Sheldon23 Ideas To Grow Your WordPress Business in 2023
WordPress is the most popular website-building platform worldwide, trusted by numerous brands. WordPress enables you to build a user-friendly and highly reliable site, together with tools and plugins to enhance your marketing and work like a lead magnet. All these features make WordPress the platform chosen by more than 43% of businesses globally.
SolidWP Editorial TeamSign up now — Get SolidWP updates and valuable content straight to your inbox
Sign up
Get started with confidence — risk free, guaranteed

