How to Resolve BackupBuddy Timeouts
Seeing a timeout occur on your BackupBuddy backup can be quite stressful and confusing. In this post, we will go over the most common types of problems that cause BackupBuddy timeouts and how to resolve them. Why Do BackupBuddy Timeouts Occur? A BackupBuddy timeout can occur for many reasons, so it's important to understand the server your website is running on.

Why Do BackupBuddy Timeouts Occur?
A BackupBuddy timeout can occur for many reasons, so it’s important to understand the server your website is running on. [pullquote]BackupBuddy timeouts often revolve around how the server is handling the backup whenever BackupBuddy is creating the ZIP archive of your backup.[/pullquote] If the server running your backup can’t handle the entire process, then BackupBuddy will stop the zipping process, resulting in a timeout. Zipping the backup is a crucial part of the backup, so it’s good to know some troubleshooting steps! For example, the most common timeouts happen on websites that are running under Litespeed, a type of server software. Why? Litespeed will often cancel long-running PHP processes after a specified time. For example, if it’s set to stop the process after 25 seconds, then the result will be a timeout if the backup hasn’t reached the maximum time per chunk.Change the Maximum Time Per Chunk
By default, the maximum execution time for BackupBuddy to complete a process is defined by your server configuration. To override this, you might consider changing the Maximum time per chunk setting to 20 seconds. This will split the backup to run each chunking process under 20 seconds, making the cut of the 25-second timeline.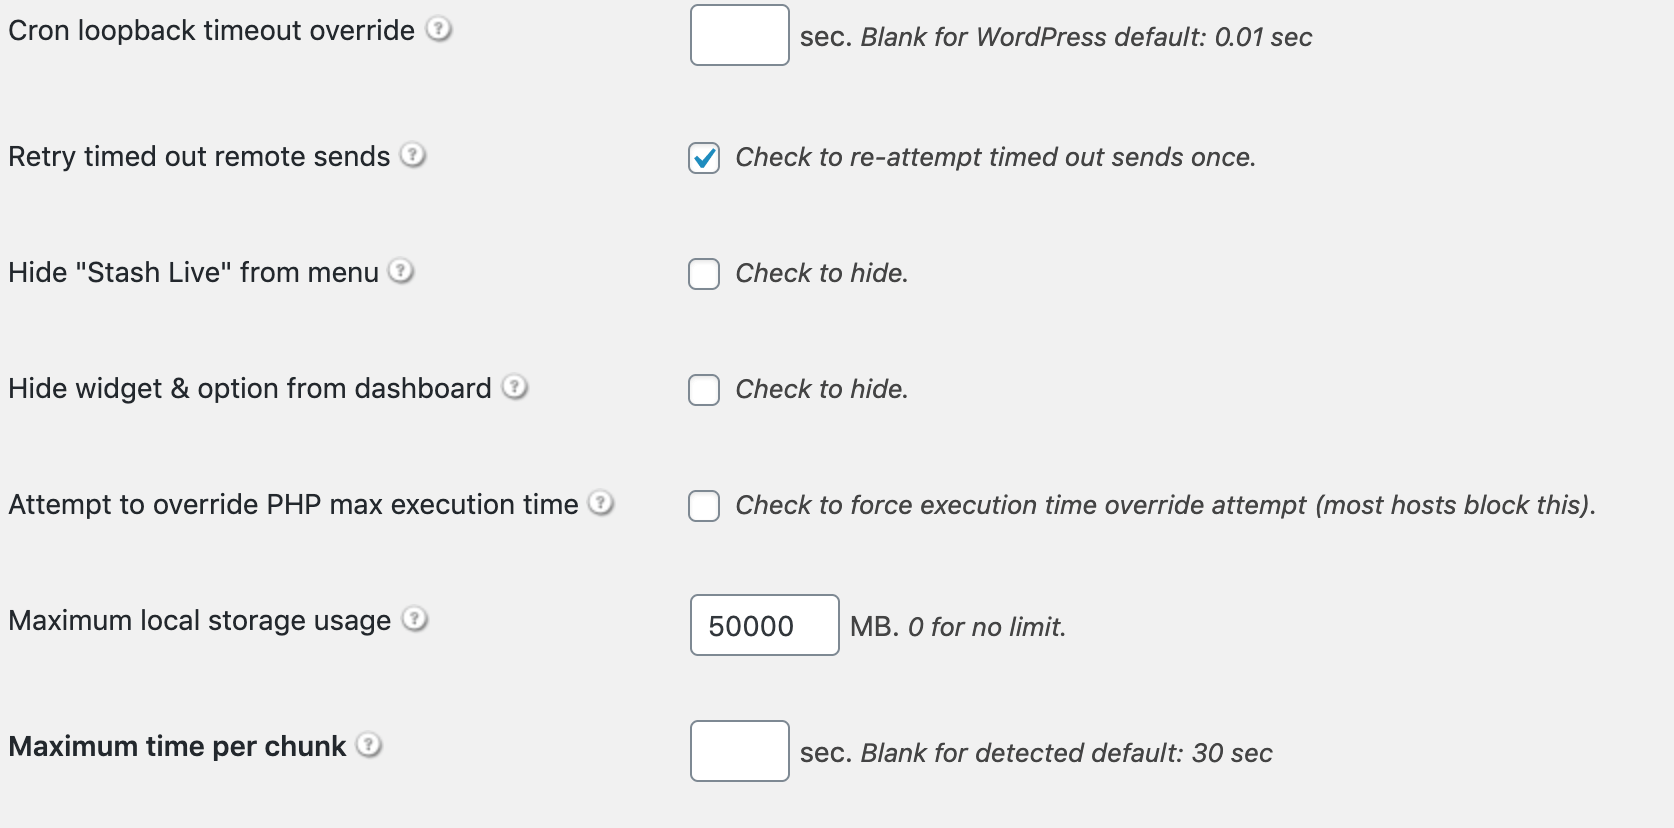
My Server Seems Okay, So What’s Next?
If your server is configured correctly and you’re still experiencing timeouts, then there might be an issue with the server running the script or handling the ZIP archive. An example of this is running zip compression, which is recommended on most sites.Enable Zip Compression
Zip compression decreases the size of files stored in the backup, however, the server may be running the process too long and will result in a timeout. Disabling the zip compression may increase the overall ZIP archive size, but it does help if the server is having difficulty with compression. This is the most common troubleshooting step that resolves timeouts.
Troubleshooting BackupBuddy Timeouts
Litespeed Servers
Your first bet in making sure backups don’t timeout is checking your server configuration. This code snippet below will allow BackupBuddy to run outside the constraints of Litespeed. If you’re running under Litespeed, try adding this to your .htaccess file:<IfModule LiteSpeed> DisableCgiOverride On RewriteEngine On RewriteRule (wp-cron|backupbuddy|importbuddy)\.php - [E=noabort:1, E=noconntimeout:1] </IfModule>Note: If you can’t find your .htaccess file, please ensure you have the option to view hidden files on. After the code is added, reupload the file so it overwrites the old file with your new changes.
Maximum Time Per Chunk
BackupBuddy’s Modern Mode will split up your backup into chunks by utilizing the wp-cron, however, some servers may cut off their chunking time prematurely which can lead to timeouts. If you’re experiencing timeouts, then you might want to consider changing the value so it requires BackupBuddy to run each chunk before the server’s reported time.Zip Settings
If you aren’t running under Litespeed, then you’re most likely going to want to configure your BackupBuddy zip settingsto avoid BackupBuddy timeouts. These settings are strictly related to how BackupBuddy will zip the backup.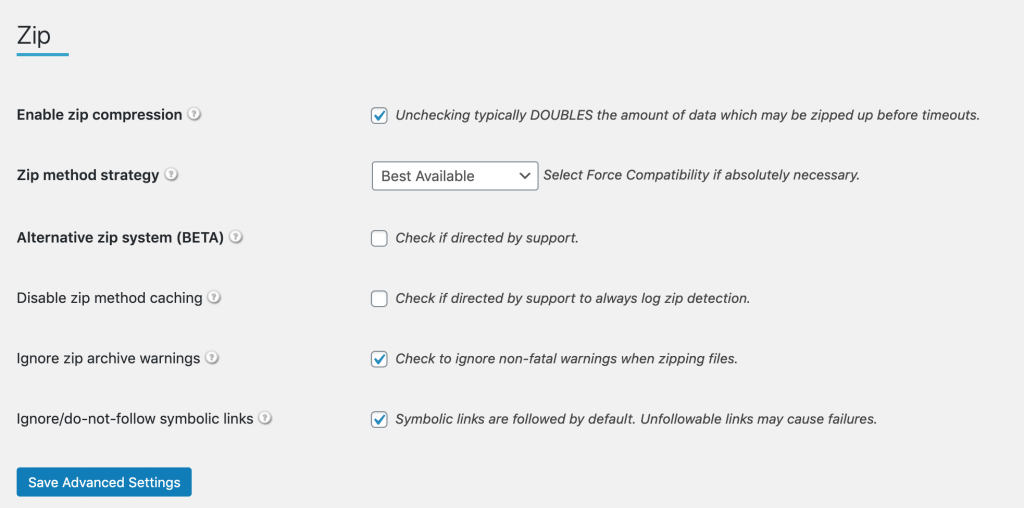 The first step would be to see whether or not you’re running zip compression. If you’re running zip compression and experiencing timeouts, try disabling it. This fixes the problem about 70% of the time since servers (shared servers in particular) don’t have the capacity for compression.
Disable zip compression from within the Zip settings, then try the backup again. You will notice that the ZIP archive may seem a bit bigger, but this is because the archive is not being compressed.
The first step would be to see whether or not you’re running zip compression. If you’re running zip compression and experiencing timeouts, try disabling it. This fixes the problem about 70% of the time since servers (shared servers in particular) don’t have the capacity for compression.
Disable zip compression from within the Zip settings, then try the backup again. You will notice that the ZIP archive may seem a bit bigger, but this is because the archive is not being compressed.
Alternative ZIP System
The Alternative Zip system is a great solution if your backup is still experiencing timeouts after disabling zip compression. The standard ZIP system is the actual ZIP executable (command-line) or library (PclZip). Given the backup root directory and list of exclusions scans the site and internally determines the list of files for the ZIP archive and builds it. Once the process is underway, then it can’t be interrupted and most run until completion, which some servers can experience timeouts from. The Alternative Zip System does scanning to build the list of files for the ZIP archive. Because it has control of that, it can give the executable/library lists of files that will be added to the ZIP archive. This allows the Alternative ZIP System to perform “bursts” as it wants to regain control after each set of files is added. This helps to alleviate any timeouts that a server may experience during the zipping process.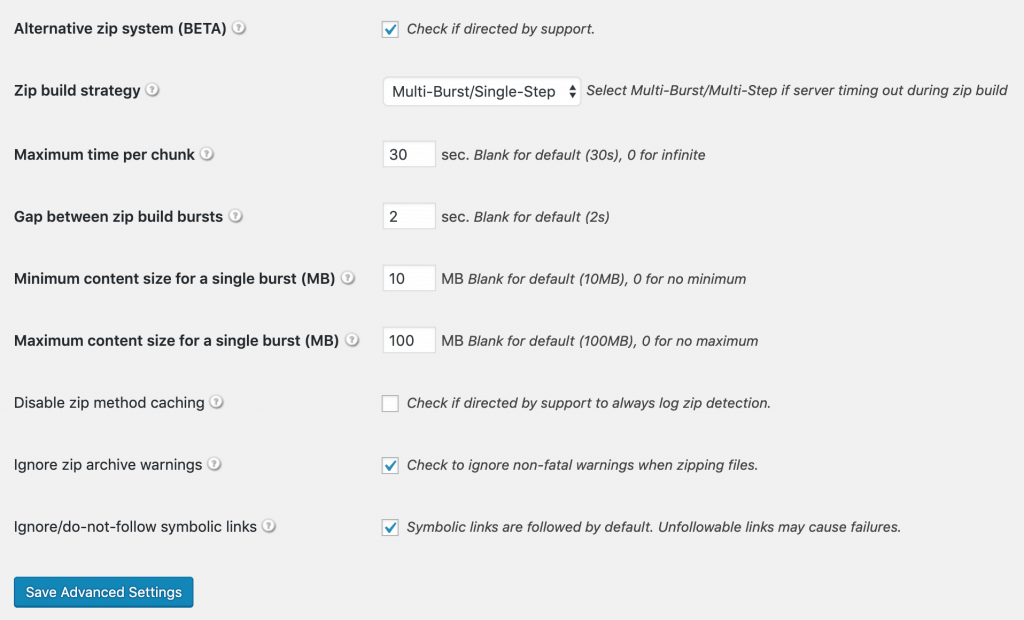 Once the Alternative Zip System is enabled, then these settings will be applied by default.
- Go ahead and leave the Zip build strategy as “Multi-Burst/Single-Step” as this will allow the ZIP archive to build faster.The “Multi-Burst/Multi-Step” strategy is made for servers that timeout during the building of the ZIP archive. If your backup is timing out during the building of the ZIP archive, then you should change to “Multi-Burst/Multi-Step”.
- The Maximum time per chunk option is the maximum amount of time BackupBuddy should allow a ZIP archive build to run before pausing and scheduling a new continuation step. Some servers prematurely timeout without notice, so this can cause the ZIP archive to stall. If the ZIP archive times out during the zipping process, then setting a value here will help alleviate timeouts. If your server’s maximum execution time is 30 seconds, then you should try cutting down the value to 25 seconds. This will make BackupBuddy run each process under 25 seconds and not exceed the execution time of 30 seconds set by the server.
- The Gap between zip build bursts option will apply between each ZIP archive build burst. Some servers/hosting might benefit from having a small period of time between bursts to allow the server to catch up with operations and/or allow average load over time to be reduced by spreading out CPU and disk usage. This option is best to be kept at the default (2 seconds).
- The Minimum content size for a single burst (MB) option tells BackupBuddy the minimum amount of content it should add per burst request. The default value is 10MB, which is enough for most servers to be able to handle. It’s best to keep this value the same unless the server can’t handle the minimum amount of content.
- The Maximum content size for a single burst (MB) option tells BackupBuddy the maximum amount of content it should add per burst request. The default value is 100MB. However, some cheaper hosting plans may not be able to handle this much content being requested. If you enable the Alternative Zip System and still experience timeouts, then you may want to tweak this setting by starting at 50MB as the maximum.
Backups That Time Out During Database Dump
Sometimes, you may encounter that your backup is timing out during the database portion. The database step dumps all of your rows into their respective tables and creates a .sql file that will be added within your backup. Timeouts can occur during this step for primarily two reasons: The table being dumped is corrupt in one way or another, or there’s an issue with the wp-cron.Corrupt Database Tables
Which table is causing the timeout? You may want to look at the table that’s causing the timeout, as it could be corrupted. The table can be viewed from either PhpMyAdmin or if your hosting provider offers a database management solution it can be viewed there.- Try excluding the table from the backup, and see if it alleviates the problem. If it does, then more than likely the table is corrupt.
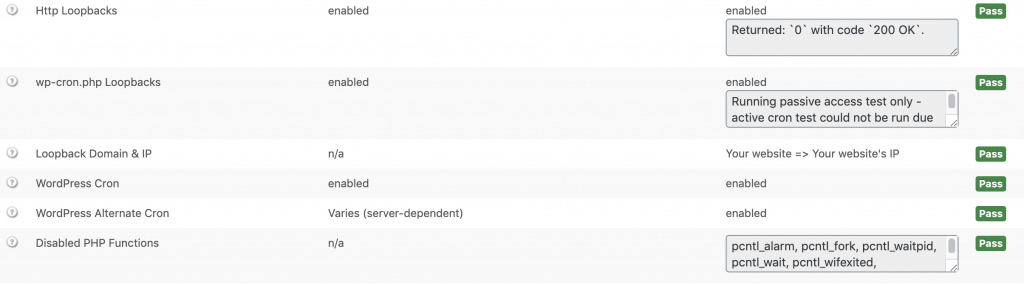
WP Cron
If the first table in the database is timing out, then there could be an issue with the wp-cron. If you’re unfamiliar with the wp-cron and how it functions, then you can check out our documentation WP cron. BackupBuddy runs a cronPass step that will schedule a cron job to run for the database dump, so if there’s another plugin running a cron job at this time then it can cause conflict.- If your site uses any caching, then flush the cache as this is a common issue with the cron.
- You can also try temporarily deactivating all plugins except BackupBuddy to find the plugin causing this conflict.
- You can also check to see if the wp-cron is enabled on the server and if the wp-cron is disabled or there are no cron jobs made and/or set up incorrectly. This can lead to cron problems.
Errors Within BackupBuddy Timeouts
Errors can also occur during a backup, mostly the zipping process, that looks like a timeout. It’s a good idea during troubleshooting to look at the status log and see if there were any errors that happened before the timeout. Generally, the most common type of error is reported from PHP. The most common type of error is with PHP memory. If your server doesn’t support the exec (command-line) ZIP method or ZipArchive, then it will use PclZip. Since PclZip uses PHP as a ZIP utility tool, it relies on the PHP configuration to run the ZIP task. Every site that runs PHP has a PHP memory set in their php.ini file, and if it exceeds the memory then it will return this error:Fatal error: Allowed memory size of 33554432 bytes exhausted (tried to allocate 2348617 bytes)If your server doesn’t support exec, then you will need to increase your PHP memory to allow the backup to run until completion.
Wrapping Up
As you can see, there are many different factors to consider when you see a BackupBudy timeout. It’s important to read the status log when doing troubleshooting as it provides more information as to why this timeout occurred. Also, understanding your server and its configuration will give you more insight for its capabilities when running the backup process. Walking through these steps above will provide the most common troubleshooting steps for dealing with timeouts. If you’re still having problems with a BackupBuddy timeout, our support team is standing by. Visit the iThemes Help Desk now to open a support ticket.Get Release Notes for SolidWP products delivered right to your inbox.
Sign up
Join us for the next Solid Academy Webinar!
Free weekly webinars that will help you master WordPress and increase your business's bottom line.
What is a WordPress Phishing Attack?
Learn how to identify and prevent phishing attacks on WordPress websites.
Kiki SheldonWebsite Protection: 5 Ways to Keep Your Website Safe
Robust website protection is the shield that stands between your business and relentless cyber attacks. Prioritizing website protection enables businesses to fortify defenses to safeguard their online presence and preserve the trust of their customers in the face of ever-evolving cybersecurity threats.
Kiki Sheldon23 Ideas To Grow Your WordPress Business in 2023
WordPress is the most popular website-building platform worldwide, trusted by numerous brands. WordPress enables you to build a user-friendly and highly reliable site, together with tools and plugins to enhance your marketing and work like a lead magnet. All these features make WordPress the platform chosen by more than 43% of businesses globally.
SolidWP Editorial TeamSign up now — Get SolidWP updates and valuable content straight to your inbox
Sign up
Get started with confidence — risk free, guaranteed
