Solid Deployments is a Solid Central Pro feature.
Deploying file and database updates between two sites hosted on different servers can be frustrating and time-consuming, requiring several manual steps and/or the use of a 3rd party tool. With Solid Migrations, we do the hard work for you, allowing you to spend this time on other more valuable tasks.
This guide will walk you through the deployment process, how it works inside the Solid platform, and the steps involved in successfully copying files and database tables from one host to another. By the end of this document, you’ll know how to confidently deploy between two WordPress sites on different hosts using Solid Deployments.
How is a Deployment different from a Migration? #
For customers using Solid Central, the terms Deployment and Migration refer to two different, albeit similar processes:
- A Deployment involves publishing or promoting code or content from one environment (like staging) to another (like production). Useful if you wish to push a site live or sync content between development, staging, and production environments,
- A Migration is about moving an entire WordPress site, including its files, database, plugins, themes, and media, from one host to another. It also involves changing the domain of the destination site to match that of the origin site, see Solid Migrations 101. If you’re pushing file and database changes from one server to another, you’re in the right place.
How Deployments Work #
Solid Deployments automates most of the work in transferring your files and database from one host to another. Below is a breakdown of each step involved in the process.
(Optional) Connecting the Origin and Destination Sites to Central #
If the origin and/or destination sites that you wish to use for the deployment are not already connected to Solid Central, you will need to connect them by repeating the process outlined below for each site.
Before proceeding, you will need to make sure you have the following credentials for the sites that you wish to connect:
- WordPress Admin login for the origin site
- SFTP or SSH credentials for the server where your destination site is hosted
Navigate to the Sites list in Solid Central and click on “Add Site”. This will then take you through the process of connecting the site to Central.

You’ll need your WordPress access credentials for the site. These are required so that Solid Central can test the connection, and add the site to Central.
Once the site has been connected to Central, you will be prompted to enter the SFTP/SSH credentials so that Central can verify the connection to the server ahead of starting the deployment.
Getting Started with a Deployment #
In order to begin the process of deploying the files and database tables from the origin site to the destination site, log in to Solid Central, click on “Sites” in the navigation, and click on the site you wish to deploy from in the list of sites.
Once you arrive at the dashboard for the site you just selected, click on the “Deploy” icon, and then select “Start a Deployment” from the options to begin the process.
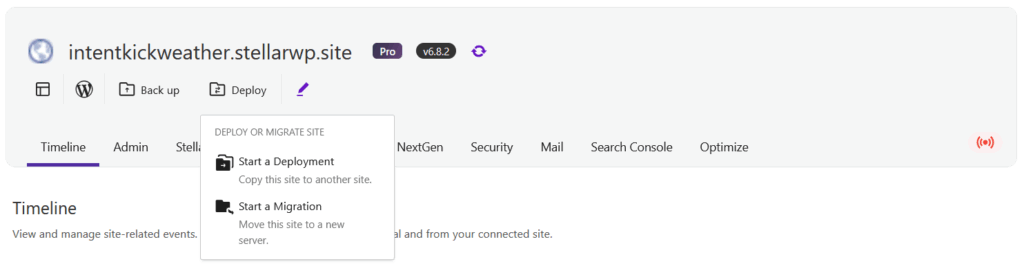
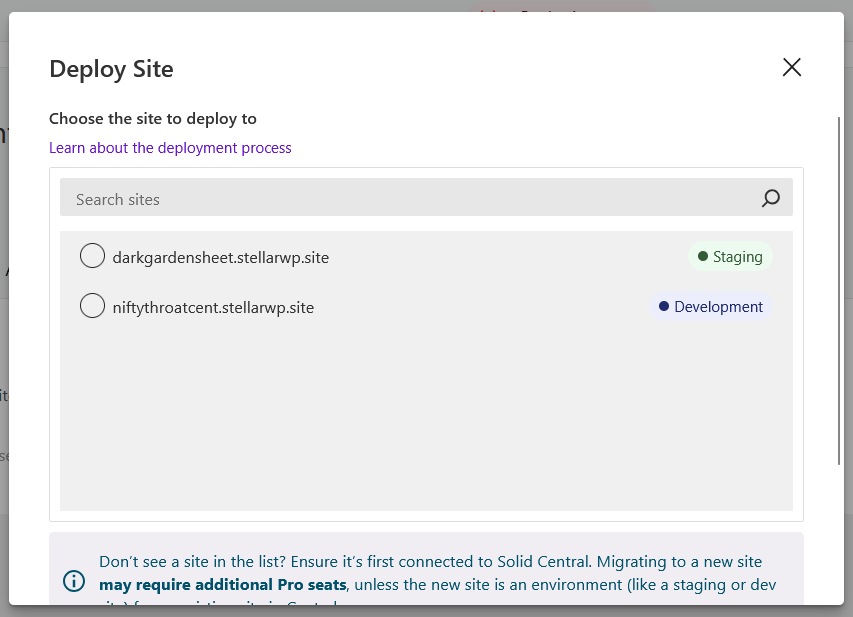
You will then be asked to select a destination site from a list of sites that are already connected to Solid Central.
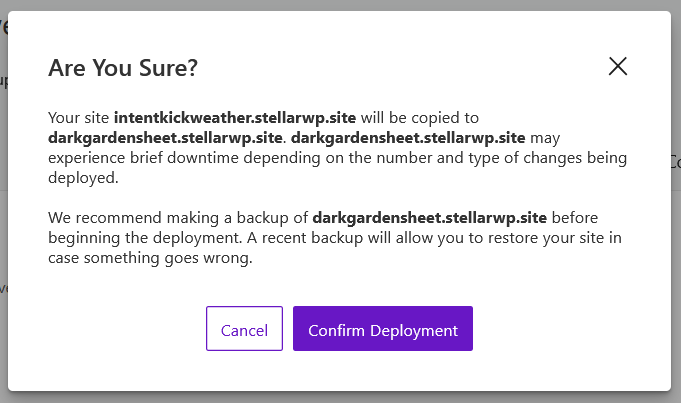
You will now be asked to confirm that you wish to proceed with the deployment.
Copy the Files and Database to the Destination Site #
All of the site files, including themes, plugins, and media and the full WordPress database will now be copied to the destination environment.
This will overwrite the destination site as it currently exists on the server. Be sure to take a backup of the site beforehand if needed.
The time required to complete the deployment varies, but it is typically around 10-15 minutes for a standard WordPress site, depending on site size. Larger or more complex sites will take longer e.g. sites with vast media libraries, a significant number of plugins/files, large databases, etc.
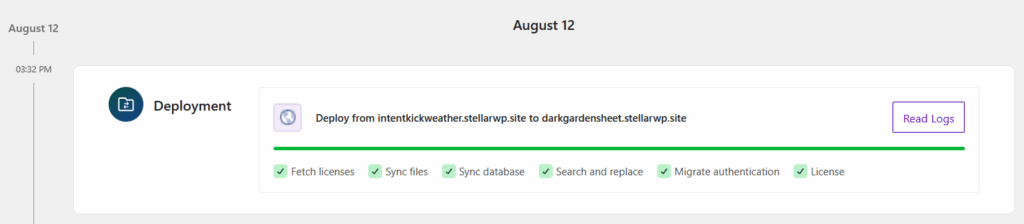
You do not have to be present for the deployment to progress. The deployment card in the timeline view will always reflect the current status, and you can click on “Read Logs” to get a better understanding of how it is progressing.

Replace the URLs/paths on the Destination Site #
Once the content has been successfully deployed to the destination site, Solid Migrations runs an automated search and replace to adjust URLs, file paths, and environment-specific values, so that it reflects the destination site URL rather than the origin site URL.
Post-Deployment Verification #
Now’s your chance to walk through the destination site as a visitor would. Test the front end and admin area, check for broken links and missing assets, and confirm login functionality.
A successful verification means the deployment successfully replaced the files and database tables on the destination site with those from your origin site.
Troubleshooting Common Deployment Issues #
If you are experiencing issues with the destination site after the deployment has completed, here’s what to check:
- Check that all files and database content were copied correctly.
- Look in the destination server’s PHP error logs or the WordPress debug log.
- Consider rerunning the deployment, as this will perform the file and database transfer steps again.
A Recap of the Deployment Steps #
Here’s a quick overview of the key steps in the deployment process:
- Ensure that both the origin and destination sites are connected to Central, and that the SSH/SFTP connections have been configured and verified.
- Select the site you wish to deploy from, click the “Deploy” button, choose “Start a deployment” and select the destination site.
- Start the deployment, and wait for the file, database and URL replacement steps to complete.
- Confirm that everything works as expected.
Conclusion #
Solid Deployments is an intuitive and powerful tool built for copying files and database tables between sites on servers that you control, or even from a server you control into StellarSites. The process is designed to inspire confidence, with automated transfers and URL/path replacements and deep integration with Solid Central.
