Solid Migrations is a Solid Central Pro feature.
Migrating a WordPress site is typically a time consuming process that is either carried out manually, or requires the installation (and sometimes, purchase) of a 3rd party migration tool. With Solid Migrations, we do the hard work for you, allowing you to spend this time on other more valuable tasks.
This guide will walk you through the migration process, how it works inside the Solid platform, and the steps involved in successfully moving a site from one host to another. By the end of this document, you’ll know how to confidently migrate a WordPress site between two different hosts using Solid Migrations.
What are the differences between a Migration and a Deployment? #
For customers using Solid Central, the terms Migration and Deployment refer to two different, albeit similar processes:
- A Migration is about moving an entire WordPress site—including its files, database tables, plugins, themes, and media—from one host to another. It also involves changing the domain of the destination site to match that of the origin site.
- A Deployment involves syncing code and database tables from one environment (like staging) to another (like production). If you wish to push a site live or sync content between development, staging and production environments, see Solid Deployments 101. If you’re moving a whole site from one server to another, you’re in the right place.
Important: In order to perform a migration, your origin site must be configured to use your own registered domain name e.g. mydomain.com, with DNS that is properly configured. Temporary or placeholder domains (e.g. tempsite.mydomain.com) are not supported for migrations. Migrations is intended to be used when migrating your existing website to another server.
How Migrations Work #
Solid Migrations automates most of the work in moving a WordPress site to a new location, but some steps still require user action, especially around DNS changes and final verification. Below is a breakdown of each step involved in the process.
(Optional) Connecting the Origin Site to Central #
If the server hosting the origin site that you wish to migrate is not already connected to Solid Central, you will need to connect it.
Before proceeding, you will need to make sure you have the following credentials for the origin site:
- WordPress Admin login for the origin site
- SFTP or SSH credentials for the server where your destination site is hosted
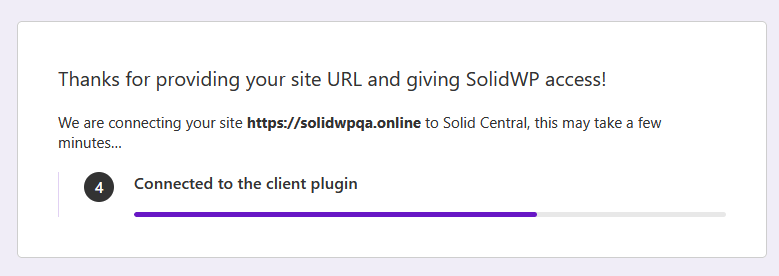
Navigate to the Sites list in Solid Central and click on “Add Site”. This will then take you through the process of connecting the site to Central.

You’ll need your WordPress access credentials for the origin site. These are required so that Solid Central can test the connection, and add the origin site to Central.
Once the site has been connected to Central, you will be prompted to enter the SFTP/SSH credentials so that Central can verify the connection to the server ahead of starting the migration.
Getting Started with a Migration #
In order to begin the process of migrating your chosen origin site to a new server, login to Solid Central, click on “Sites” in the navigation, and click on the site you wish to migrate from in the list of sites.
Once you arrive at the dashboard for the site you just selected, click on the “Deploy” icon, and then select “Start a Migration” to begin the migration process.
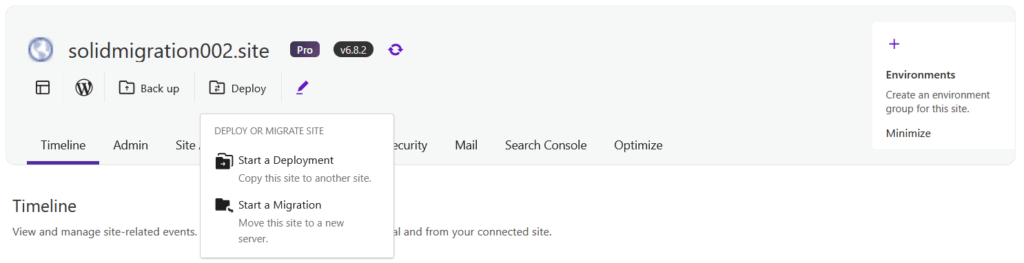
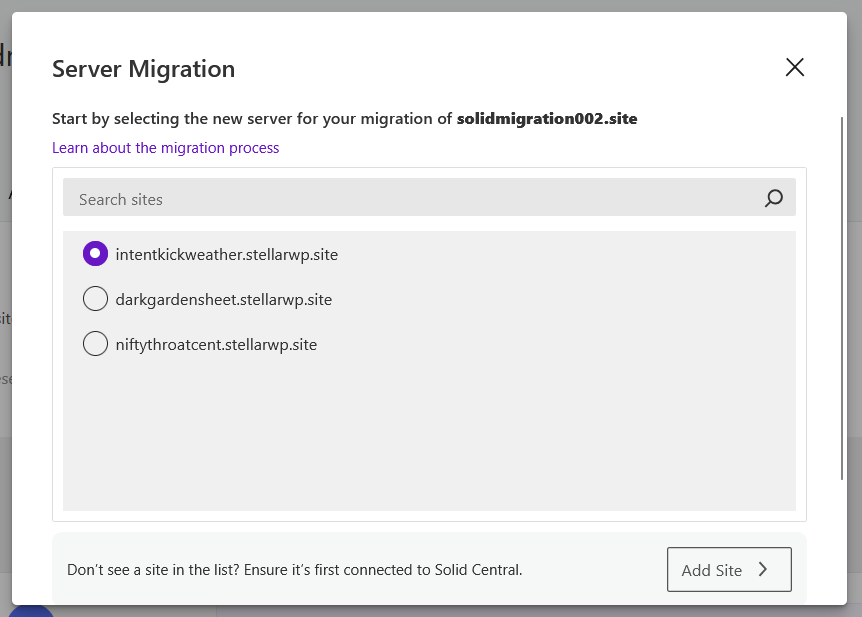
You will then be asked to select the destination site from a list of sites that are already connected to Solid Central, with the option of connecting a new site (as detailed in the previous step) that is not already present in your Central account, for use as the destination.
Connecting the Destination Site to Central #
Before proceeding, you will need to make sure you have the following credentials for the destination site:
- WordPress Admin login for the destination site
- SFTP or SSH credentials for the server where your destination site is hosted
To begin the migration process, you’ll need your WordPress access credentials for the destination site. These are required so that Solid Central can test the connection, and add the destination site to Central.
Once the site has been connected to Central, you will be prompted to enter the SFTP/SSH credentials so that Central can verify the connection to the server ahead of starting the migration.
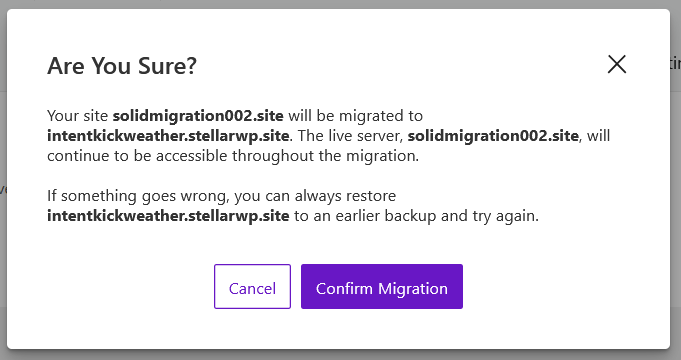
Once the connection is verified, click on “Confirm Migration” to proceed to the next step.
Transfer the Files and Database to the Destination Site #
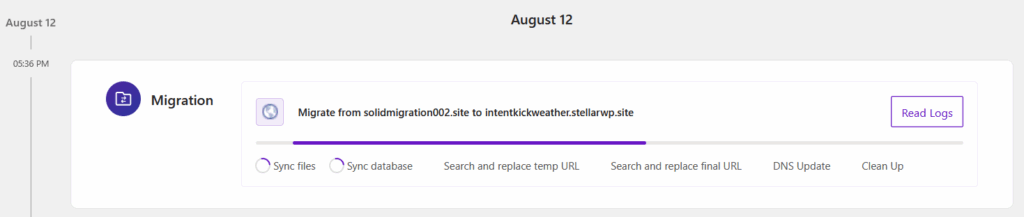
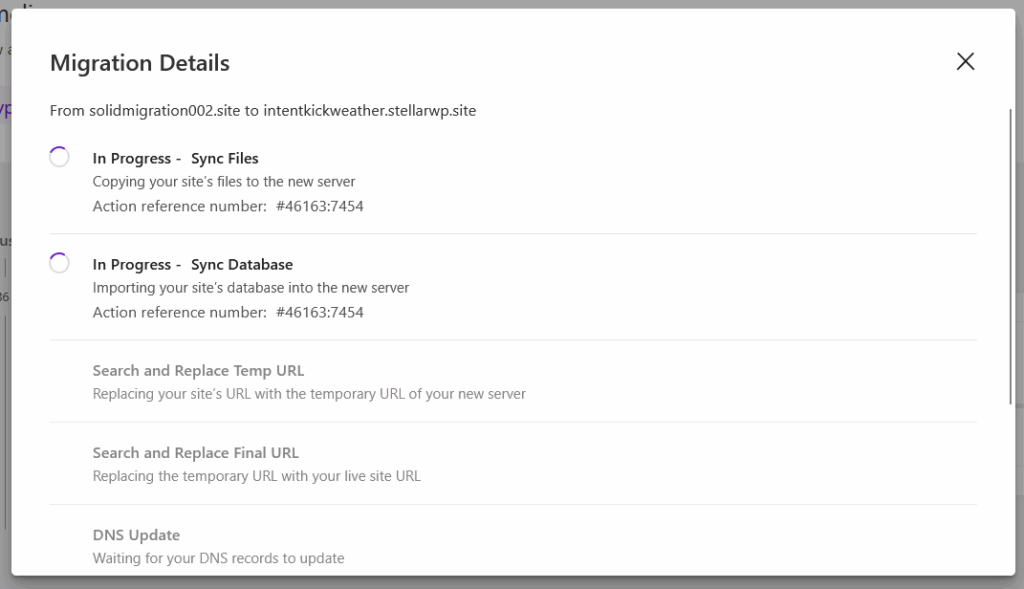
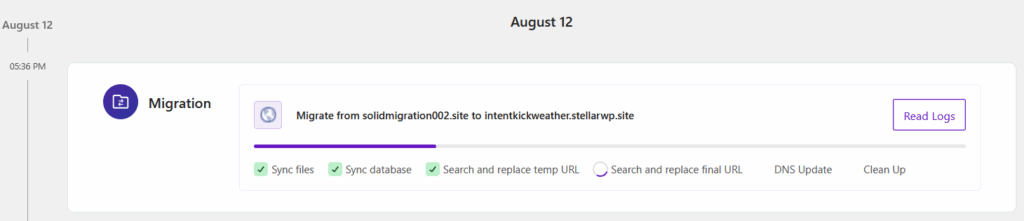
All of the site files, including themes, plugins media and all of the WordPress database tables will now be copied to the destination environment. You’ll be able to follow the progress of the migration by looking at the new card that will have appeared in the timeline for the site.
This part of the process will overwrite the destination site as it currently exists on the server. Be sure to take a backup of the site beforehand if needed.
The time required to complete the deployment varies, but it is typically around 10-15 minutes for a standard WordPress site, depending on it’s site size. Larger or more complex sites will take longer e.g. sites with vast media libraries, a significant number of plugins/files, large databases etc.
You do not have to be present for the migration to progress. The migration card in the timeline view will always reflect the current status, and you can click on “Read Logs” to get a better understanding of how it is progressing.
Update the site URL in the database on the Destination Site #
Once the content has been successfully migrated to the destination site, Solid Migrations runs an automated search and replace to adjust URLs, file paths, and environment-specific values, so that it reflects the destination, rather than origin site. The URL from the origin site is replaced with the temporary URL provided by your host.
Review the status of the Migrated Site at your Temporary URL #
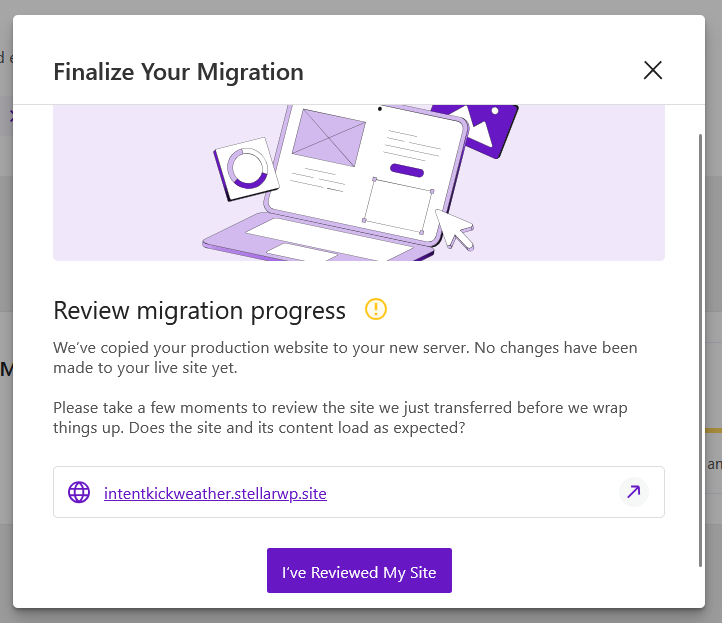
After the migration completes, you’ll be able to use the temporary URL provided by your hosting provider to inspect your site, before updating your DNS records. This temporary domain is typically an automatically generated subdomain such as tempsite01.yourhost.com
This URL allows you to:
- Preview the full migrated site in a live environment.
- Test navigation, media, forms, and critical functionality.
- Access the WordPress Admin to verify settings and content.
This temporary domain is not meant for receiving visitors. It’s possible that some of the plugins and custom code may behave differently until your custom domain is pointed to the server hosting the destination site, and the migration has completed.
It is important that you use this opportunity to validate your site before finalizing the migration and going live with the new site. Once you are happy to proceed with the next steps, click “I’ve Reviewed My Site” to confirm.
(Optional) Migrate Again or Cancel #
If you need to apply updates to the origin site after previewing the migrated site, you can click “Resync My Site” to re-run the migration and overwrite the destination with the latest version. At this stage, you can also click “Cancel this Migration” if you decide not to proceed.
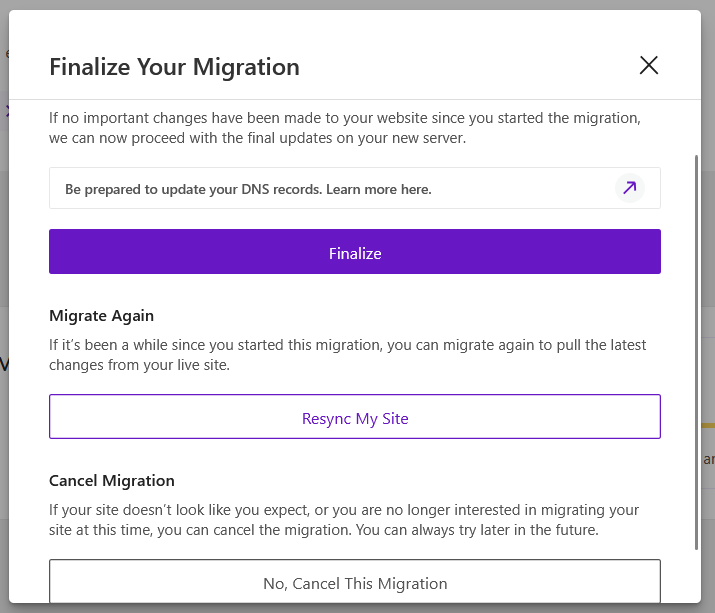
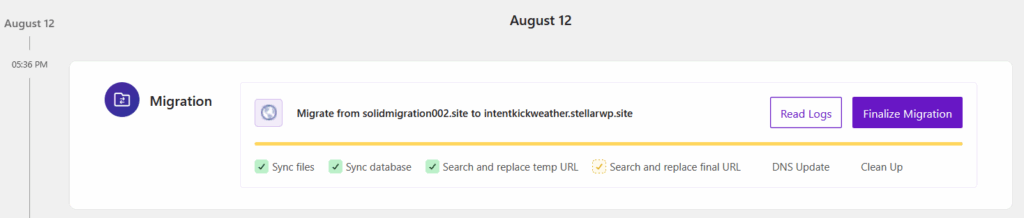
Finalize the Migration #
If you are happy with how the migration has progressed so far, click on “Finalize Migration” to proceed.
When finalizing the migration, Solid Migrations runs one final search and replace on the destination site to ensure no lingering references to the old domain or file paths remain.
Updating your DNS Records #
Once you’re satisfied that the newly migrated site is functioning correctly at the temporary URL, it’s time to make the necessary changes to your domain’s DNS records, to point the domain to the new server where the destination site is hosted.
At this stage in the migration process, you will have been presented with details of the specific updates that need to be made to your DNS records. This will involve adding a CNAME record (which may replace an existing CNAME) to point to the new host’s IP address or URL, or changing your nameservers.
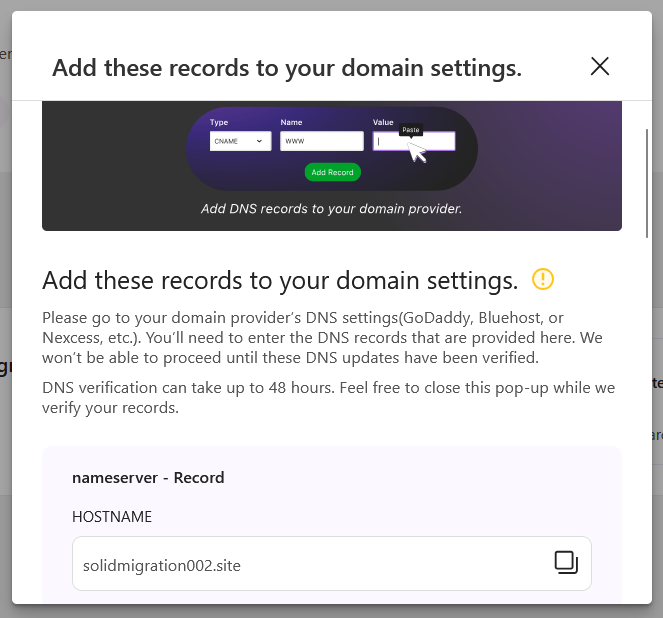
To update your DNS records, you will need to login to the account for your hosting or domain/DNS provider, locate their DNS management panel, and carry out the update using the details provided.
For some providers, it isn’t immediately clear where this panel exists, which is why we have curated a list of DNS documentation links for many popular providers, to help with modifying your DNS records.
Note: DNS changes may take up to 24 hours to propagate, though many update within a few minutes.
Final Cleanup #
These final housekeeping tasks ensure that your Solid Central dashboard is updated, to reflect the fact that the origin site has replaced the destination site:
- The origin site is disconnected from Solid Central.
- If the site is enrolled with Backups NextGen, backups from the origin site will stop.
- Timeline entries associated with the destination site are removed.
- The origin site’s historical timeline and migration records are preserved.
- Central now treats the destination site as the “official” site.
Final Manual Verification #
Now’s your chance to walk through the destination site as a visitor would. Test the front end and admin area, check for broken links and missing assets, and confirm login functionality.
A successful verification means the site is now live and running from the destination server.
After the Migration is Finalized #
Once the migration has been finalized:
- You’ll manage the destination site in Solid Central going forward.
- If the site is enrolled in Backups NextGen, scheduled backups will now be taken from the destination site.
- All historical logs and timeline entries for the origin site are kept, but the connection has been removed.
This ensures your history stays intact while shifting control and responsibility to the new host entirely.
Troubleshooting Common Migration Issues #
If the migrated site doesn’t look right after the migration completes and the DNS updates propagate, here’s what to check:
- Check that all files and database content were copied correctly.
- Look in the destination server’s PHP error logs or the WordPress debug log.
- Consider rerunning the migration, as this will perform the file and database transfer steps again.
- Double-check the status of the DNS propagation for the domain with tools like whatsmydns.net.
A Recap of the Migration Steps #
Here’s a quick overview of the key steps in the migration process:
- Choose the origin site you want to migrate from in your Solid Central dashboard.
- Optionally connect a new origin site to before beginning the migration.
- Select “Migrate site” and follow the prompts to choose the source and destination sites.
- Optionally connect a new destination site before beginning the migration.
- Enter the SSH/SFTP credentials for the origin and destination sites and verify these connections.
- Start the migration, and wait for the files and database to transfer.
- Preview the site at the temporary URL.
- Return to Solid Central and finalize the migration.
- If satisfied, update your domain’s DNS settings to point to the new destination site.
- Allow time for DNS changes to propagate.
- Confirm that everything works as expected.
- Let Solid Central perform a final cleanup to close out the process.
Conclusion #
Solid Migrations is a powerful and intuitive tool that can be used to move sites between hosts, or even into StellarSites. The process is built for confidence, from automated transfers and URL/path replacements, to DNS guidance and deep integration with Solid Central.
